Junior Chefs

At PlayDate.com, we realize that there’s no shortage of recipe books out there and even more online cooking sites than ever before. While we appreciate the resources and look forward to providing you with great tasting recipes, we created Junior Chefs corner to focus more on the interactions that occur when you cook together. It’s a great opportunity to talk to your kids about what’s going on in their lives.

A great icebreaker can be to discuss the occasion for which you are cooking. Use this time to share funny stories about family members, reminisce about past birthday parties, and talk about the meaning behind certain holidays. You’d be surprised how many people attend holiday functions just because it’s a party and have no idea of the significance behind it. While we at PlayDate.com don’t subscribe to any one religion, we see this as a great opportunity to enhance your experience and add meaning even as basic as cherishing the golden rule. Many of us are often intrigued by other cultures and religions yet don’t necessarily have a good grasp on our own heritage.
Anyone can break out with ingredients and a recipe book to make chocolate chip cookies and pop them in the oven while the kids watch television. While there may be a time and place for that, we’re talking about taking it a little further. It’s about preparing healthy meals and teaching them about having good eating habits. It’s about setting aside a certain portion of your freshly baked goods and perhaps handing them out to neighbors or those in need. It’s more memorable and adds meaning.
The best learning generally occurs from total immersion. That means if you’re trying to learn a language or any subject for that matter, it’s always best to surround yourself with people only discussing that which you are trying to learn versus just sitting in a sterile room and repeating phrases to yourself. This helps create a learning urgency in order for you to get around and communicate. If you find yourself in a foreign country and need to use the restroom, I’m sure you’ll figure that one out pretty quickly. Your first priority was to get your needs met and the incidental learning (or secondary gain) of learning the language occurs faster and with less effort.
Cooking provides that perfect forum to achieve that secondary gain you want to impart on your children. It may sound a little sneaky but it works well for both sides. While you’re both engaged in preparing food, various secondary lessons can be taught. This may include, but not limited to, eating habits, cultural sensitivity, helping others, and etc. Please share your recipes or cooking stories with us so that we may try them at home.
Recipes from our Junior Chefs
After School Apple Snacks
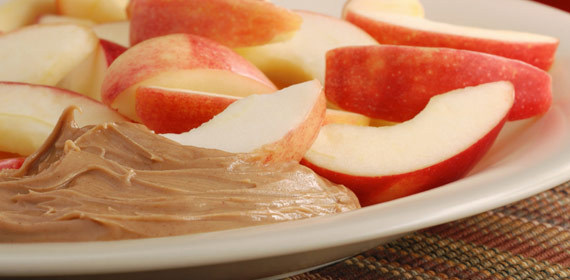
Everyday around three o’clock my kids come running through the door home from school. Everyday around three o’clock they are absolutely ravenous. I do my very best to fill them up with something healthy, even though they prefer the chips and cookie standby. Because all kids prefer junk food, I always try to spin healthy food in a way that is more appealing to their junk food tendencies.Cue apple fries and apple nachos. These are both so simple, and super healthy.
First for the apple fries. To make these I use one apple and slice it. Be sure to remove any core from your slices. Place your slices on a plate. Next for your nacho toppings.
My kids prefer warmed peanut butter. I just put a tablespoon or so in a dish and microwave it until it is thin enough to pour over the apple chips. Then you can top with nuts, cranberries, banana pieces, mini chocolate chips. Pretty much anything that sounds tasty to you and your kids. Serve quickly while the peanut butter (or any kind of nut butter) is still warm. It is fantastically delicious. And so much more healthy than chips covered in cheese!
My next apple snack are fries. That’s right, apple fries. Sometimes I serve this alongside baked chicken fingers. Everyone knows that chicken fingers and fries go together. You peel your apple and then cut it into long strips, a la French fries. Again, these are great dipped into warmed peanut butter, or my kids favorite sprinkled with cinnamon.
Two super easy healthy snacks that are totally kid friendly.
Apple Pie (Traditional)
Ingredients:
2 piecrusts
1/2 c plus 1 tsp granulated sugar
1/2 c packed light-brown sugar (I use dark brown)
3 tbsp cornstarch
1/2 tsp ground cinnamon
1/4 tsp salt
1/8 tsp ground cloves
2 lbs granny smith apples, peeled and cored
2 lbs Fuji apples, peeled and cored
2 tbsp unsalted butter
2 tbsp lemon juice
1 large egg, beaten with 1 tbsp water
1. Heat oven to 400 degrees.
2. Place one piecrust into a 9” deep dish pie plate, covering bottom and sides of plate. Prick bottom of crust with a fork; refrigerate while assembling filling.
3. In a small bowl, blend 1/2 c of the granulated sugar, the brown sugar, cornstarch, cinnamon, salt and cloves. Set aside.
4. Cut apples into 1/2-inch pieces (I cut each apple in half and then thinly slice each half).
5. Melt butter in a large skillet over medium heat. Add apples, lemon juice and sugar mixture. Cook 10 minutes, stirring occasionally, until pan juices thicken. Cool on rack for 25 min.
6. Pour cooled apple mixture into prepared crust-lined pie plate. Unroll second pie crust and roll out to 12 inches. Cut 1-inch vent hole in center of dough. Transfer dough to pie, centering over filling. Crimp edge together and flute decoratively.
7. Brush pie with egg mixture; sprinkle with remaining 1 tsp granulated sugar.
8. Bake at 400 degrees for 20 minutes, then reduce temperature to 350 degrees and bake an additional 25 minutes. Cover pie with foil if it browns too quickly.
9. Cool at least 1 hour before slicing and serving.
Apple Salsa
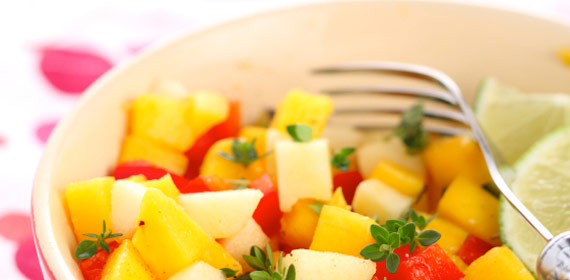
Fall is just around the corner, I swear it is! I am looking forward to it so much that I just can’t help myself. I’ve be scouring through all of my pumpkin and apple recipes. One of my favorites is apple salsa. During the summer months I will make regular old fruit salsa. Essentially a fruit salad with the fruits chopped much smaller. A dash of sugar and lime juice to finish it off. Served with pita slices or cinnamon sugar tortilla chips. But come fall, I skip all the fruit but the apples. It makes for a decadent dip, perfect for those fall get togethers. Football parties, thanksgiving appetizer, or anything in between.2 cups of apples, peeled, cored, and chopped. I use a few different types of apples to give a depth of flavor and a more interesting texture. Generally I go for a firm sweet apple, and a firm tart apple.
2 tablespoons lemon juice
3-4 tablespoons dark brown sugar
1/2 teaspoon cinnamon
1 teaspoon cornstarchCombine the apples, lemon juice, sugar, and cinnamon in pot over medium heat. Heat until boiling.
Once boiling, mix the cornstarch in a teaspoon or so of water, to make a paste. Pour the cornstarch paste into your boiling apple mixture. Stir until the sauce thickens.
This dip is amazing served both warm and chilled. If the weather is cold and dreary though, I always go for warm.
For dipping, I opt for cinnamon sugar tortillas. Slice your flour tortillas into wedges, cover in melted butter, and sprinkle with cinnamon and sugar. Bake at 350 until golden brown. This can take just a few minutes so don’t wander off while they are baking. Burnt chips are bad.
Left over apple salsa is a great addition to your morning oatmeal, or even a dollop on some yogurt.
Banana Bread
1 c. sugar
1/2 c. butter or margarine
2 eggs
2 bananas
1/3 c. milk
1 tsp vanilla
2 c. all purpose flour
1 tsp baking powder
1/2 tsp salt
1/2 c. chopped nuts (optional)
- Heat oven to 350 degrees.
- Grease bottom or a 9×5 inch loaf pan.
- In a large bowl, cream sugar and butter/margarine until light and fluffy. Beat in eggs. Blend in milk and vanilla.
- In a small bowl, combine flour, baking soda and salt. Mix well.
- Add 1/4 of the flour mixture to sugar/butter mixture. Add 1/2 of a banana to mixture. Alternate between adding flour and bananas until all ingredients are combined.
- Pour into prepared pan.
- Bake at 350 degrees for 50-60 minutes. Cool in pan for 5-10 minutes. Remove from pan and cool completely on a wire rack.
- If not consuming, wrap and store in the refrigerator.
Banana Fruit Snacks
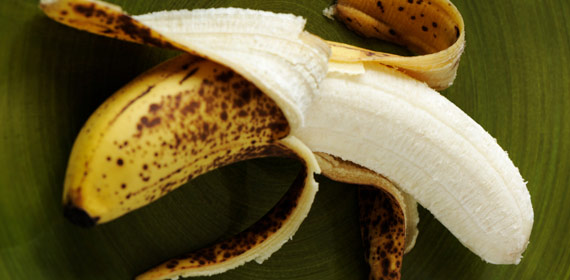
My middle son is an absolute fruit snack addict. He wants them for breakfast, lunch, dinner, snack, and dessert. I tried switching him over to just dried fruit, but that didn’t go over very well. Turns out it is the gummy aspect that he likes, in addition to the sugar. Because really, what four year old doesn’t love a gelatinous blob of sugary “fruit” flavoring? Yuck. So like any self respecting over-achieving mom I thought, I can make my own fruit snacks! And they will be filled with what I want my kids to have! You can choose all organic fruit if you want. You can sweeten with stevia, or whatever your sweetener of choice may be. For these banana fruit snacks I chose non organic, and regular sugar (because I was using so little, and quite honestly I was out of anything else.) Shhh! Don’t tell any of my organic loving friends.
Your ingredient list is simple.
You will need:
Two very ripe bananas. I like to choose ones that are slightly over ripe. The riper they are, the sweeter they are and the less added sweetener you will need.
1/2 cup lemon juice
4 packets of unflavored gelatinMash your bananas and mix with the lemon juice. Simmer the banana lemon juice mixture for about two minutes. You just want to get the fruit soft.
When the bananas are good and soft you will want to purée them until smooth. Use your immersion blender, food processor, or regular ole blender. Whatever gets the job done. At this point, taste the mixture. You can add sweetener one teaspoon at a time until things taste the way you like. I have never once used more than three teaspoons of sweetener. The bananas are usually sweet enough. After it tastes good stir in your gelatin packets. Adding the gelatin while its still in the blender is generally how I do it. That way I can blend to make sure the gelatin is well mixed in.
Pour your mixture onto a cookie sheet lined with parchment paper.
Put them into the fridge and allow the gelatin to do its thing. It usually takes a few hours.
When it is perfectly firm remove from the fridge and out of the pan. You can find and use tiny little cookie cutters, but for me, I just use my pizza slicer to make small squares (okay, technically cubes).
Store in an airtight container in the fridge. Mine never last more than a week or two (but I’ve got three kids).
Best Ever Chocolate Cookies
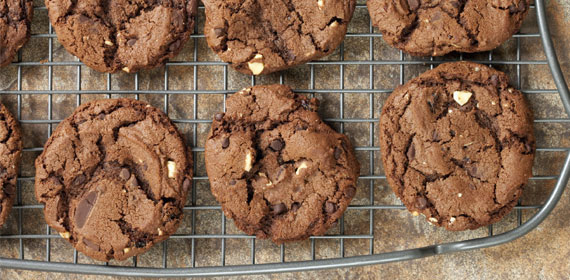
No secret my love of chocolate and my love of baking. Long and hard I have searched for a chocolate cookie that was both delicious, and able to be rolled and cut into fun shapes. Don’t misunderstand me, non-shaped chocolate cookies are tasty, but I wanted to be able to have fun and decorate them as well. I don’t ask for much. After tons of adjusting I have finally arrived at my preferred chocolate sugar cookie recipe. It holds it’s shape without spreading, it’s crisp on the edges but soft on the inside. It’s sturdy enough to carry some frosting, and it tastes like love.You will need:
1 cup softened salted butter
1/4 cup shortening (important for texture!)
1 1/2 cups sugar
2 eggs
2 teaspoons vanilla
3/4 teaspoon baking powder
Heaping 2/3 cup cocoa
3 cups all purpose flourCream your butter, shortening and sugar in your stand mixer, gradually add your eggs one at a time. Next comes the vanilla. Finally add your cocoa and flour, one cup at a time.
Chill your dough for about an hour, roll out, cut, and bake in a preheated 375 degree oven. Bake for 6 and a half minutes. The cookies will look slightly underdone, but they will finish cooking as they set. Leave them on the baking sheet for about a minute before removing to cool.
Cool completely and frost to your hearts content. Or just eat them the way they are, they are just that good!!
Best Ever Oven Fries
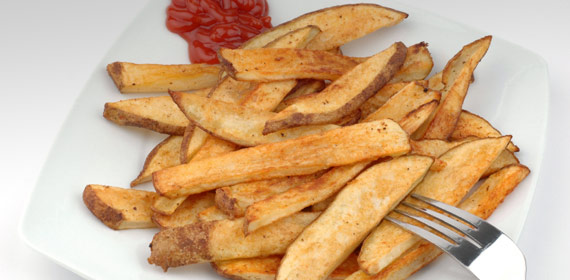 My kids, like most kids their age love French fries. I will not deny that I am a fan myself. Being a bit older and wiser though, I tend to steer away from most fried foods. Which is sad really, because sometimes you just need a French fry. So for years I tried oven fry recipes, one after another. Noting the things I liked about some, and the things that just didn’t work from others. My poor kids have suffered through many oven baked fry mishaps. All was not for naught however, I have finally come up with a recipe worth repeating!
You will need about four russet potatoes. Peeled, and cut into your desired French fry shape. I often cut them into wedges, or thick cut style. However, you can make them as thin as you want, just know that your cooking times will be shorter so you should pay extra attention while baking.
You will also need:
6-7 tablespoons of vegetable oil
A teaspoon (or more to taste) of salt
1/2 teaspoon (or more to taste) of garlic powderHeat your oven to 475. Get it good and hot! While the oven is preheating boil a pot of water. Place your potatoes into a large mixing bowl. When the water begins to boil pour it over the top of your potatoes. Let them soak for about fifteen minutes.
Drain the water and use paper towels to thoroughly dry the fries.Spread five tablespoons of your oil onto a cookie sheet. Spread it around so it covers the entire thing. Sprinkle some salt and garlic directly onto the pan.
Place your potatoes back into their now dry mixing bowl and toss with the remaining oil and a pinch or two of garlic and salt. Lay the fries onto the oiled cookie sheet in a single layer.
Bake for fifteen minutes. Remove from oven and flip the fries. Return to the oven and continue to bake another 10-15 minutes. Your fries should be perfectly golden brown (and delicious). Place them onto a plate lined with paper towels to absorb any rogue oils. And enjoy!Best From Scratch Brownies
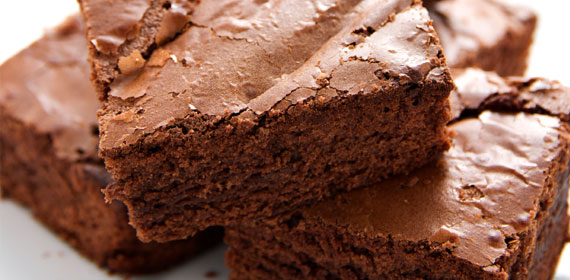 Sometimes you just need chocolate. Sometimes baking with your kids can turn a bad day into a great one. Some days you just want brownies. Now, I honestly don’t have much against a good brownie mix, they are easy and awfully convenient. However, as with many things I think making something completely from scratch every now and again will return better results. And for those days I am giving you my go to rich, chewy, delectable, brownie with fudge frosting recipe.
Brownies
3 ounces unsweetened baking chocolate
1 stick of butter, unsalted
3 room temperature eggs
3/4 cup dark brown sugar
1 cup white sugar
3/4 cup all purpose flower
1/2 teaspoon baking powder
1/2 teaspoon saltPlace the chocolate and the butter into a sauce pan over low heat. Cook until chocolate and butter have melted together, stirring occasionally. Set this aside until cool. I usually put the whole pan in the fridge to help it cool.
Beat the eggs in a stand mixer until foamy. Add the sugars and mix well. In another bowl, mix the dry ingredients together.
By this point your chocolate mixture should be at least room temperature. Slowly pour into the egg sugar mixture, with the mixer on low. Stir until the chocolate is all incorporated. Mix in the flour.
Pour the batter into a buttered rectangular pan.
Bake at 350 until set.As soon as the brownies are out of the oven make the frosting.
Brownie Frosting:
6 tablespoons milk
6 tablespoons softened butter
1 1/2 cups granulated sugar
1 cup semi sweet chocolate chips
1 teaspoon vanillaPlace the milk, butter, and sugar into a medium saucepan over medium low heat. Bring to a boil stirring frequently. Allow it to boil for about thirty seconds, turn off the heat and stir in the chocolate chips. Stir until the chips are well melted and the whole mixture is smooth. Then pour over your warm brownies. Allow it to set for about 15 minutes while your kids help you clean up (especially, the left over batter and frosting from the bowls, which are finger-licking good). Sit back with a tall glass of milk and enjoy!
Candy Cane Syrup
 Breakfast on Christmas morning is always special at our house. I know many folks try to do the big lunch, or fancy dinner, but not us. We spring for a fantastic breakfast. I’m talking, pancakes, eggs, bacon, sausage, the whole deal. I love putting a small spin on the traditional elements to make them more Christmas-y. There is just something almost magical about a recipe that you only make once a year. For us, that has been candy cane syrup. It is easy to make, and is super delicious.
There is just something almost magical about a recipe that you only make once a year
My kids do not actually enjoy peppermint candy canes, but they dig candy cane syrup. Figure that out! Here is what you need, 10 regular peppermint candy canes, 2 cups of white sugar, and one cup of water (holidays can’t always be healthy!). Woo, long shopping list. I love this recipe because on Christmas morning, I can just grab the candy canes off the tree, and put them to good use. Of course, this is not just for Christmas morning, pour this stuff into a mason jar, tie a bow around it and you have a fantastic gift!
To make the syrup, mix the sugar and water into a medium sauce pan over medium heat. While that is heating, break up your candy canes into smaller pieces. The smaller the pieces the faster they will dissolve. Add your candy canes to the sugar and water.
Stir, then stir some more. As the candy canes dissolve your sugar mixture turns more and more red. Please resist the urge to taste it. Hot sugar burns. Once the mixture is transparent red, and no longer opaque-ish you will know you are getting close. Bring the mixture to a boil. Allow it to boil until it thickens. It may be as quick as 3 minutes, and as long as 5.
Allow it it to cool about ten minutes before smothering your pancakes with it. Let it cool completely and pour it over ice cream.
Just a hint, you can make cinnamon syrup using cinnamon hard candies instead of peppermints (or just add cinnamon). Hello tasty!
Carnival Style Hot Dogs
 Little kids and birthday parties go hand in hand. There is not much more fun than a birthday party in the eyes of a child. Even when it is not their party, they are still the best things ever. For us parents though, they can be a bit of a pain. All the planning, food, cleaning, keeping track of everything can be quite overwhelming. Am I right? I am a sucker for a good back yard party for the sole reason that cleaning my backyard is not as hard as cleaning my entire house. I digress.
Now I know that my husband loves his grill time, but cooking twenty some hot dogs can even make him twitch
What I don’t like is my husband or myself being a slave to the grill while the party is going on. Now I know that my husband loves his grill time, but cooking twenty some hot dogs can even make him twitch. And then I learned that you can cook hot dogs in a crock pot. A crock pot folks! The turn it on and forget about it crock pot. I don’t know how I didn’t discover this sooner!
You need absolutely nothing special, just your package of dogs and a crock pot.
I was amazed to learn that you don’t even need to add water. The hot dogs will release their own tasty juices while cooking.
Hot dogs cooked this way, are not boiled, not barbecued, but instead are steamed and taste like the hot dogs you can get at the fair off of those cool hot dog roller things. Because they cook in their own juices they are super juicy and flavorful.
Just grab your dogs, and throw them into your slow cooker for two hours on high, or four on low. Once they are all piping hot you can switch the slow cooker to warm and leave them there for nearly ever. Or at least as long as your party lasts.
Cheesy Chicken and Noodles
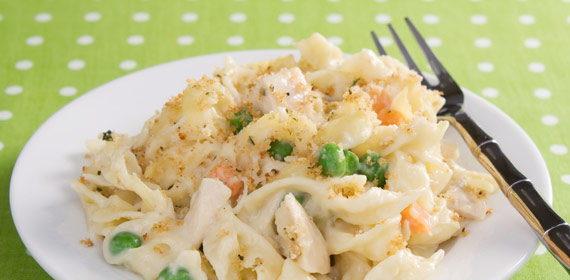
Lately I have been on the hunt for easy, quick, and most importantly, tasty dinner options. I feel like my family has gotten into a rut for dinner and I have pledged to fix it. However, like everyone else, I find myself pressed for time around dinner time. The pressure and the need for inspiration means that I have to plan things out or dinner turns ugly fast.Luckily for me the internet is full of recipe ideas for me to try. Lucky for you, I have done a lot of the experimenting and my kids have done the taste testing. So, hopefully you can avoid some of the disasters we’ve had, which I can now look back and laugh at. My husband was always supportive of me trying new things and when they failed he would simply say, “Honey, this is great but please don’t make it again!” He had to be gentle, otherwise he’d be in that kitchen on his own!
Here is one of our new favorites.
Cheesy Chicken and Noodles
What I love about this dish is that it’s easy, and is a one pot dinner. So, clean up is a snap! I love that it is versatile; you can add just about any vegetables you have on hand into the pot.
What my kids love about this dish: It’s cheesy, it’s chicken and it’s noodles.
Here is how you prepare it.
You will need:
2 large chicken breasts chopped into one-inch pieces
2 tbsp Olive Oil
2 cups of vegetables (I have used carrots, broccoli, peppers, onions, tomatoes, and mushrooms all to great success)
2 cloves garlic, minced
1 cup milk
1 can cream of chicken soup
2 cups low sodium chicken broth
1 tbsp parsley
1 tsp thyme
1 tsp basil
Salt and pepper
1/2 pound dry pasta (I have used fettuccine and/or spaghetti noodles)
1 1/2 cups of cheddar cheeseIn a large pot heat your olive oil until shimmery. Add in your chopped vegetables. If using hardy vegetables like carrots and peppers add them in first. Sauté and then add in onions or any other softer veggies. This will ensure well cooked veggies.
Toss your chicken into the pan and season generously with salt and pepper.
When the chicken is no longer pink add your cream of chicken soup, milk, broth, and seasonings. Stir to combine. Bring the mixture up to a boil then add your dry pasta. Stir it up really well to help break up the pasta and not get clumpy.
Turn the heat down to low and simmer for about twenty minutes. Stir frequently. You will know it is done when the sauce thickens and the pasta is al dente.
Turn off the heat and stir in one cup of your cheese. It should melt in fairly quickly.
Dish up and sprinkle the remaining cheese on top as a garnish.
If this doesn’t warm you up on a chilly night, then I don’t know what will!
Chili from the Heart
4 tbsp olive oil
3 lb ground beef or ground beef substitute
1 1/2 cans tomato juice
1 1/2 cans tomato sauce
1 1/2 cans kidney beans
1 1/2 cans pinto beans
2 1/4 c. chopped onion
1/3 c. chopped red bell pepper
1/4 tsp cayenne pepper
3/4 tsp white sugar
3/4 tsp dried oregano
3/4 tsp ground black pepper
1 1/2 tsp salt
2 1/4 tsp ground cumin
1/4 c. + 2 tbsp chili powder
- Heat oil in a large pot.
- Add onion and bell pepper. Sautee until onions become clear.
- Add ground beef/beef substitute to pot. Stir and simmer for 5 minutes.
- Sprinkle cayenne pepper, oregano, salt, pepper, cumin, chili powder and sugar into pot. Stir.
- Add tomato juice, tomato sauce, kidney beans and pinto beans. Bring to a boil, then lower heat and simmer for a minimum of 30 minutes.
Chocolate Banana Ice Cream
-
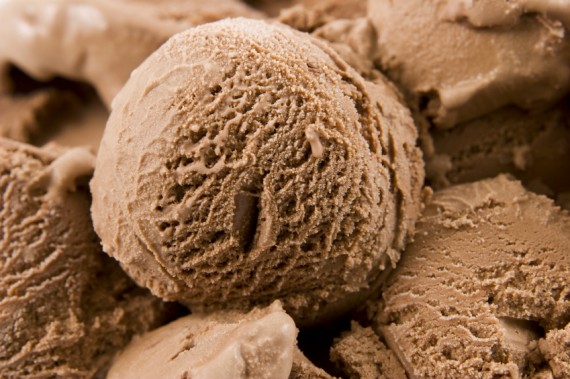
I scream, you scream, we all scream for ice cream! My family loves ice cream. In fact, ice cream might have been responsible for those ten pounds I can’t seem to get rid of. Yum, ten pounds of ice cream. Okay, that might be excessive. My kids are no exception, they would eat ice cream until they were blue in the face. I don’t know about you, but I don’t much like any of the “diet” ice creams out there. In fact, I’m sort of against “diet” products all together.
they would eat ice cream until they were blue in the face.
They are usually loaded with things that I cannot pronounce. Things I for sure don’t want my kids eating. Because of all this, we have limited our ice cream consumption to once a month. Or for special occasions. In order for us to get our fix of the good stuff we have turned to this banana “ice cream.” All you need is a banana per person, one tablespoon of cocoa powder per banana, and enough milk to make your blender happy. Peel your bananas, and give them a rough chop. Put them into the freezer and allow them to completely freeze. At least a few hours.
Once they’re good and frozen throw them into your blender with the cocoa powder and the milk. On a side note, yogurt also works well in lieu of the milk. Then blend everything together. It takes a few minutes but you will eventually have a tasty, creamy mixture that closely resembles soft serve. You can definitely eat it at this point or, if you have the time, you can cover it and put it back into the freezer to re-freeze. If you’re feeling extra creative, you can also pour it into Popsicle molds. I have been known to add extras into the mixture as well. Protein powder if I’m making it for myself, or things like flax meal to add some extra punch for the kids. Super yummy and healthy, you cannot beat that!
Chocolate Banana Pancakes
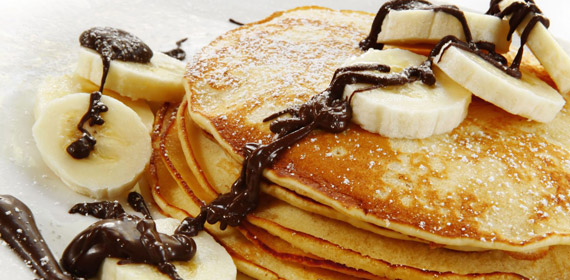
Breakfast time is awfully hectic around here. The hustle and bustle of getting everyone up, dressed, and fed makes for chaos. I know I am not alone feeling this way. Most every parent I have met says that the morning is the most stressful time of day. Because of that I attempt to do as much planning ahead as I can. Simple things like laying out clothes the night before, and prepping breakfast go a long way.At our house we love things like pancakes, but it don’t love my kids smelling like syrup all day. If you’ve ever walked into a day care, chances are you will smell a kid who smells of pancakes. He may or may not still be sticky, but for sure that syrup smell with follow you.
When you combine the chaos of our mornings with our love of pancakes you get my recipe for Mini Chocolate chip Banana pancakes. I know what you’re thinking. Yummy. The best part is that the syrup is baked right in.
This is a complicated recipe. Are you ready?
You will need:
Pancake batter (any kind you like, even instant if that floats your tastebud boats.) I use about two cups of batter
1 1/3 cups of your favorite pancake syrup
2 bananas cut into bite sized pieces
Hand full of chocolate chipsMix your batter with your syrup. Divide batter into well greased muffin tin. Top with the bananas and sprinkle with chocolate chips. Bake in a preheated oven until golden brown and delicious, about 14 minutes.
Serve warm.
Bonus, these freeze well, so you can make a huge batch and freeze some to have on other super busy mornings. Bonus number two, these little hand held lovelies are easily eaten in the car on the go.
Chocolate Oatmeal No-Bake Cookies
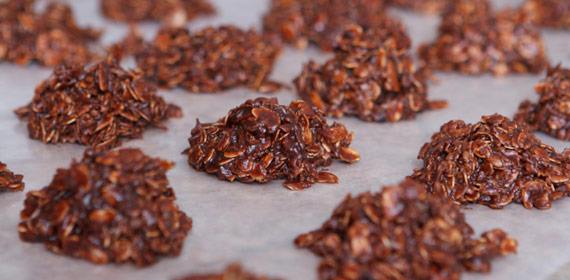 When my husband was growing up his mom made him chocolate oatmeal no bake cookies. I myself, had never once heard of such a thing. All the cookies my mom made were baked. Anything that was “no-bake” was something that came in a package. So you can imagine my confusion when my husband asked me to make them for him just after we got married. For a long time I balked at the idea of making such a ridiculous cookie. That is, until I ate one. Then suddenly I understood why he loves them. And now that I live in the south and understand what hot and humid really is, I understand the lure of a no bake cookie.
I love that these are so easy, and that my seven year old can practically make them all on her own.
Ingredients:
1/2 cup unsalted butter
2 cups white sugar
1/2 cup milk
4 heaping tablespoons cocoa
1/2 cup creamy Peanut butter
3 1/2 cup quick cooking oats
1 tsp salt
2 tsp vanillaAdd the butter, sugar, milk, and cocoa powder to a medium sauce pan. Bring to a boil. Boil, while stirring for one minute. Add the remaining ingredients and stir to combine.
Drop by tablespoons onto parchment paper. Allow to set before eating.
A fair warning, these are addictive. Little hands will become extra chocolatey. You simply cannot eat just one. Or two.
Chocolate Peanut Butter Surprise Cakes
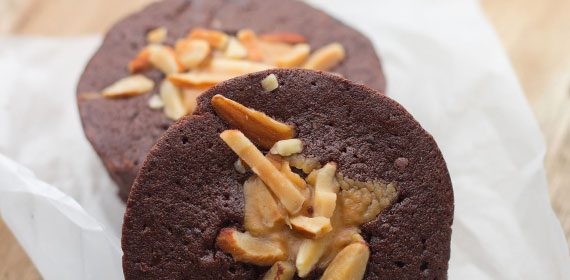
I love anything chocolaty. I know, that’s so unusual. My kids are learning how to bake, so we naturally went for a sure thing; chocolate cake. While we were mixing our batter, my daughter declared, “You know what goes best with chocolate? Peanut butter!” Not one to argue, especially with something so absolutely true. We debated the best way to incorporate peanut butter into our cakes. The obvious choice was to go with peanut butter frosting, but that felt too easy. Then we considered a peanut butter swirl. Eventually we settled on the idea of having a peanut butter surprise in our cakes. On this day we were making mini cakes. Not a cake, not a cup cake, but mini cakes. To make mini cakes we use either ramekins or small glass dishes.To make some decadent chocolate surprise mini cakes you will need:
Chocolate cake batter
You can make this from scratch (Yum!) but if you are pressed for time, or just feel like it feel free to use a box. All that matters is that you have a chocolate cake batter that tastes yummy.
1 cup peanut butter
1 cup powdered sugarPreheat your oven to 350 degrees. Butter and flour your ramekins to prevent sticking. Prepare your cake batter per your recipe. Set aside.
In a separate bowl combine your peanut butter and sugar. Try to refrain from eating it. Divide the peanut butter mixture into equal parts. It should be a fairly stiff dough, you should be able to roll it into a ball. The size of your peanut butter balls will directly correlate to how many ramekins you are planning to fill.
To assemble your cakes fill the bottoms of your ramekins 1/3 of the way full of cake batter. Add one portion of peanut butter goodness. Cover with more cake batter.
Bake in your preheated oven for about 15-20 minutes or until done.
These little bad boys are good just as is, without the need for frosting. If however, you still want some, consider some chocolate glaze or syrup instead of a full blown frosting.
Churro Inspired Waffles
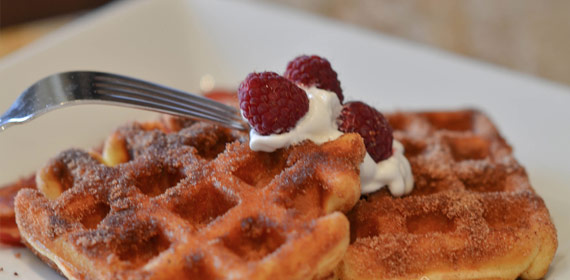
Churros are wonderful. They remind me of being a kid. They taste yummy. I would love to eat them all the time. So much so that I have gone so far as to make churro cupcakes, churro pancakes, but most recently and most successfully churro waffles. Waffles are the perfect way to replicate a churro because they crisp up perfectly and still remain fluffy on the inside. This is a perfect Saturday morning treat for your family. If you enjoy a good churro I guarantee that you will love this recipe.Your first task is to make some waffles. You can make your own, or even grab some frozen ones to get things started. Me? I prefer to make my own so I will pass that recipe on too.
To make your waffles
2 cups of flour
1 teaspoon salt
4 tablespoons baking powder
2 tablespoons brown sugar
2 eggs
1 1/2 cups milk, room temperature
1/3 cup melted butter
1 teaspoon cinnamon
1 teaspoon vanillaPreheat your waffle iron.
Mix the dry ingredients except for cinnamon.
In another bowl beat the eggs until fluffy. Add in milk, butter, cinnamon, and vanilla.
Pour the wet ingredients into the dry and beat until well blended.
Cook in your waffle iron until golden brown and delicious.
To turn your waffles into churro waffles melt 1/2 cup of butter in a shallow bowl.
In a separate bowl mix 4 tablespoons of cinnamon with 3/4 cup of white sugar.
Dip each warm waffle into the butter coating both sides. Immediately dip buttered waffles into the cinnamon sugar mixture.
Serve immediately. No syrup necessary. Maybe just a dollop of whipped cream for good measure.
Clean Strawberry Muffins
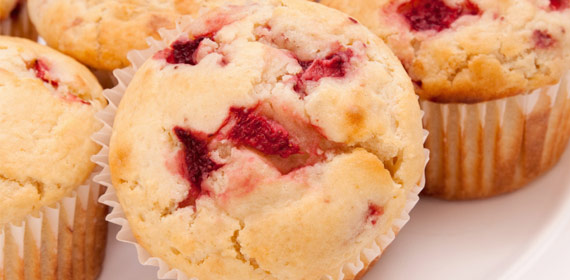
Breakfast around here is one of the hardest meals. Okay, it is the hardest meal for my family. Between getting my husband out the door for work, the kids ready for their school day, the baby just up and dressed, and me, well I try to get dressed most days too but it is chaos. Because of the chaos that breakfast time tends to be over here I am constantly trying out new “make-ahead-of-time” breakfast dishes. Our family is doing our best to attempt to eat cleaner. That means that we try to eat only whole natural foods, like fruits, vegetables, whole grains, etc. We are by no means perfect about it, but eighty percent of the time we rock the clean eating right out of the park. So when I saw this recipe on Dashing Dish (www.dashingdish.com) for clean strawberry muffins, you know I went straight to the cupboard to whip them up. Luckily, I had all that I needed ready to go.Ingredients
2 1/2 cups old fashioned oats
1 cup low fat Greek yogurt (I have in a pinch used regular unsweetened yogurt, but the Greek has a better flavor)
1/2 cup baking stevia (I like these to be sweet, but you can use a little less sweetener if you would like)
1 1/2 teaspoon baking powder
1/2 teaspoon baking soda
2 cups fresh sliced strawberries
1 teaspoon lemon juicePreheat your oven to 400 degrees
Place all ingredients except for strawberries into your stand mixer. Beat until everything is well combined.
With the mixer on low, I add in the 2 1/2 cups of the strawberries.I didn’t listen to the original recipe the first time I made it and I used regular cupcake liners. Don’t be like me. Either use a silicone muffin pan, or buy the foil cupcake liners and use only the foil portion. Trust me. If you don’t, you will waste half of the muffin on the paper and cry at all that you cannot eat.
Pour the batter evenly among your muffin pan. Grab the remaining 1/2 cup of strawberries and place one or two slices on top of each muffin.
Bake in preheated oven until a toothpick comes out clean. About 20 minutes or so and you’re ready to go!
Coconut Rice
3 c. rice
1/2 c. + 2 tbsp diced onion
3 c. coconut milk
3 c. water
3-6 slices fresh ginger root
1 tbsp curry powder
3/4 tsp salt
1. Soak rice for atleast 30 minutes. Rinse.
2. Combine all ingredients, boil, reduce heat and simmer for 20-30 minutes.
Cookie Dough Dip
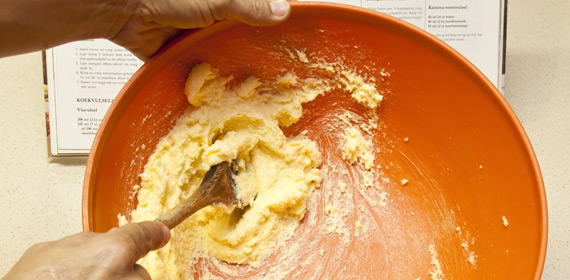
I cannot lie, I eat cookie dough. I feel that it is my right as the baker to sample the dough. You know, to make sure that it is scrumptious. I admit, I even eat it with raw eggs inside. Scandal, I know. But, those are just for a few bites here and there. If I were to really indulge in cookie dough, I would have to be safer than sorry. What is that you say? You don’t eat lots of cookie dough? You’re missing out.I often make an eggless cookie dough and serve it as a dip for graham crackers. Every time I put it out, it is a huge hit. Because it is cookie dough. I once even frosted cup cakes with this glorious stuff. Sometimes a girl just needs some cookie dough to make her life better. Cookie dough, it’s what’s for dinner.
This is the recipe for a single serving of dip, but it can easily be doubled or tripled for sharing.
You start with 1 1/2 tablespoons of unsalted butter at room temperature. Pour two tablespoons of brown sugar on top of that. Using a fork mash the butter and the sugar together. It will sort of become pasty. Next stir in 3 tablespoons of flour. At this point the whole thing will look iffy, and you will worry about my sanity. Keep at it. That crumbly mess will soon make sense. Next add in 1 tablespoon of vanilla yogurt. If the mixture continues to be dry add in a bit more yogurt until you get cookie dough consistency.
Toss in a pinch of salt and a hand full of chocolate chips (to taste). Stir to combine.
Enjoy! Dip in pretzels, graham crackers, fruit, just about anything is tasty! Because, you know, it’s cookie dough!
Creamy Macaroni & Cheese
2 tbsp butter
1 c. cottage cheese (not lowfat)
2 c. milk (not skim)
1 tsp dry mustard
pinch cayenne
pinch freshly grated nutmeg
1/2 tsp salt
1/2 tsp freshly ground pepper
1 lb sharp or extra sharp cheddar cheese, grated
1/2 lb elbow pasta, uncooked
- Heat oven to 375 degrees. Place oven rack in upper 1/3 of oven.
- Use 1 tbsp butter to grease a 9 inch square or round dish.
- In a blender, puree cottage cheese, milk, mustard, cayenne, nutmeg, salt and pepper.
- Reserve 1/4 c. of grated cheese for topping later.
- Combine remainder of grated cheese in a bowl with milk mixture and uncooked pasta.
- Pour into prepared pan, cover with foil. Bake at 375 degrees for 30 minutes.
- Uncover. Stir gently. Sprinkle with 1/4 c. grated cheese and 1 tbsp buter.
- Bake uncovered for 30 minutes, until browned.
Crock Pot “Baked” Apples
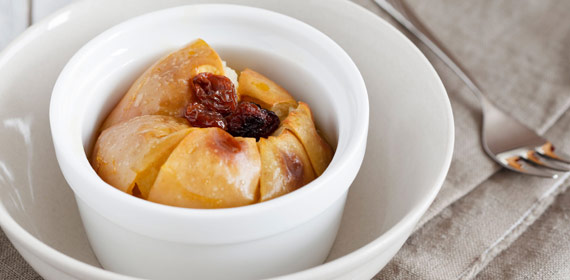
Fall means its time for apples! I love busting out my apple recipes and utilizing all of the fantastic seasonal apples. One of my favorite fall deserts would be baked stuffed apples. This is one of those recipes that you really could eat for breakfast too. It’s not much more sweet than a bowl of cereal. Plus it has things like apples and oats. They are good for you, right?Let’s get right to the goods here.
Grab some apples. I used five Fujis. You will need to remove the cores of your apples. However, try to leave about a quarter inch at the bottom of the apple so all of the goodness that you stuff inside won’t fall out. I used a paring knife to gut mine. Don’t panic if you accidentally go all the way though. Just stick a small square of foil underneath the apple then stuff it. The foil will keep the goodness in.
Once you have cored your apples give them a good washing.
In a large bowl mix 1/3 cups of oats (not quick cooking or you will end up with gruel) 1/3 cup of dark brown sugar, 1 tablespoon softened unsalted butter, and one teaspoon each of cinnamon and nutmeg.
Stuff the apples until they are practically overflowing with the oat mixture. Place them in your crock pot. Pour a generous half cup of apple juice (mix with water if you want less sugar) into the bottom of your crock pot. Cover and turn on high. Cook until your apples are falling apart. This really depends on two things, how well you like your apples cooked. I prefer mine less cooked than other people. I like just a tiny crunch still there. It will also depend on the size of your apples. Smaller apples will obviously cook quicker. I begin to check mine right at about two hours.
Serve these warm for breakfast, or a la mode for desert!
Crock Pot Macaroni and Cheese
 I love my crock pot. It’s like making dinner without even having to cook. Okay, I realize that I have to do some work, but it’s minimal, and I like it. It is perfect for those nights when we have a million things to do, and not enough time to do them. School functions, homework, sports, piano, it all takes time away from me in the kitchen. One of my family’s favorite dishes in the crock pot would be macaroni and cheese. It’s to be expected, my kids are still young. They love carbs and cheese.
It is so easy to make this, any one can do it.
Start with 8 ounces of macaroni cooked to just under al dente (it’s about half of a box)
8 ounces (one bag) of shredded Monterey Jack cheese
8 ounces shredded cheddar cheese
8 ounces of Velveeta
1/2 cup grated Parmesan
4 tablespoons butter
8 ounces milk
1 teaspoon powdered mustard
1 teaspoon garlic powder
Salt and pepperPut everything in your bowl of your crock pot and mix. Turn that sucker on to low and wait. It takes my crock pot about four hours on low before this is done, but I do realize that everyone’s crock pot might be different. You should probably start to check if it’s ready at the 3 hour mark. If it does finish early, the warm setting will keep it yummy until you are are ready to eat.
The edges of the crockpot often get crispy and brown, which is my favorite part. If you don’t like that, just stir your macaroni more often while it is cooking.
If this bowl of cheesy carb goodness isn’t quite healthy enough for you, there are lots of ways to jazz it up. I often add chopped broccoli the last half hour before cooking. You could also add chopped cooked chicken breasts along with The broccoli to make it more of a well-rounded meal.
Crock Pot Oatmeal
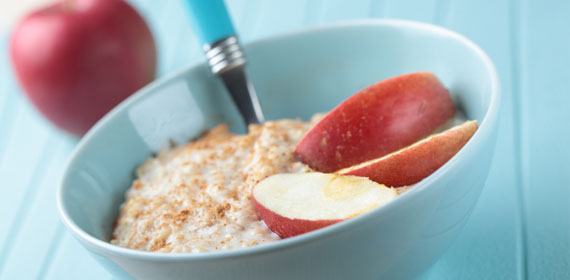
I love breakfast. Breakfast makes me happy. A good warm, hearty meal gets me all warm and fuzzy feeling. What I do not love, is making breakfast. To make a big breakfast in my house, I either have to wake up well before my brood or accept that we are going to eat a little bit later than usual. I’m not sure about you and yours, but my kids wake up hungry. The thought of waiting that extra twenty minutes could be their undoing. Most days I would rather not risk it. For this reason I often turn to crock pot breakfasts. Things that I can assemble the night before to enjoy the following day.I prefer to have breakfast ready at 8am, so for a dish that needs to cook 8 hours it needs to be turned on at midnight. Not a problem if you head to bed at that time or thereabouts. I’m in bed by 10:30 though. So I need my crock pot to magically turn on for me while I am sleeping. All you need to do this is a light timer. You know, the kind you use to have your Christmas tree turn on and off. Or the kind you use to have your lamps turn on and off while you are on vacation. Simply set the timer to come on at midnight, plug it in and your crockpot (set to the appropriate setting) and go! So easy.
For this recipe you will need:
2-3 firm apples sliced
1/2 cup packed brown sugar
2 teaspoons of salt
1 tablespoon cinnamon
2 cups old fashioned oats (not instant or you will end up with gruel for breakfast)
1 cup apple juice
1 cup water
2 cups milk
Spray your crockpot with non stick spray, or line it with foil. Place all of the ingredients into your slow cooker in the order listed. The is no need to stir. Turn that thing on at midnight or 1 am. Enjoy hot apple cinnamon oatmeal when you awake.
Custom Cookie Cutters
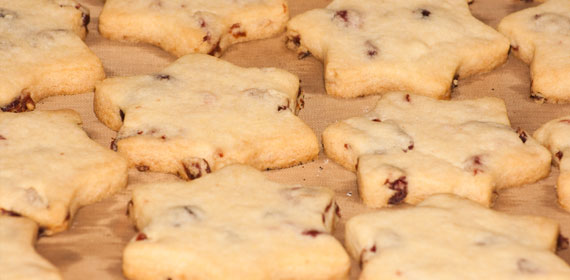 The Holiday Season is upon us, and we all know that means it’s time to get into the kitchen and start baking some Cookies. We all have our favorite cookies for the season, and mine just happen to be a good shaped sugar cookie decorated with some royal icing. Simple, classic, and yummy. My biggest problem are the cookie cutters. Store bought cutters are expensive, and don’t always have the shape I want. And that is why I have started creating my very own cutters.
For a cutter that you imagine only using for one batch, something specific to a party. You can try to make a cutter out of aluminum foil. This method is cheap and easy. It really only works for shapes that don’t have a ton of intricacies.
Store bought cutters are expensive, and don’t always have the shape I want
To make one out of aluminum foil grab a long sheet of foil. Cut it in half, lengthwise. Now fold your foil in half lengthwise, over and over again. Repeat until you have one long strip of aluminum foil that is about one inch tall. Use a rolling pin to flatten it down if necessary. Take that long strip and bend it and mold it into your desired shape. When you are done, staple to the two loose edges together. You should have a close and bluntly sharp edge on one side, which you will use for cutting. This type of cutter is pretty fragile, but absolutely works in a pinch. This is a great method for kids to come up with their own creations and try their hands at personalizing their design.
You can also use an aluminum disposable roasting pan. Just cut it into strips and shape away. Staple the edges to finish.
Another method I have tried involves old soda cans. Use caution when making these because aluminum cans can be very sharp and absolutely can cut you.
Grab an empty soda can and cut it in half. Then cut the top and bottoms off (or some leave them on as a protective grip for your cutter). You should be left with two circle shaped pieces of can. You now have two options, you can reshape the circles however you want, or you can cut the circles to open them and mold them similar to how you molded the foil. Again, be careful not to cut yourself.
Even more sturdy on the lists of cookie cutter ingenuity is simply starting with an inexpensive circle shaped cutter from the store. You will want to choose one that you can squeeze and the shape gives a little. Take it home and use some pliers to make it the shape you desire.
Finally, the most labor intensive way to create a custom cookie cutter is to purchase some copper ribbon from your local hardware store. This method is best left to an adult, the ribbon can in fact be sharp. Once you have molded your shape, you will need double sided tape (specific to metal) and some clamps. Apply the tape, clamp it shut and allow it to rest enough time for the glue to mature. This method is the most difficult but it will last the longest. Personalized cookies are always more fun to eat!
DIY Uncrustable Sandwiches
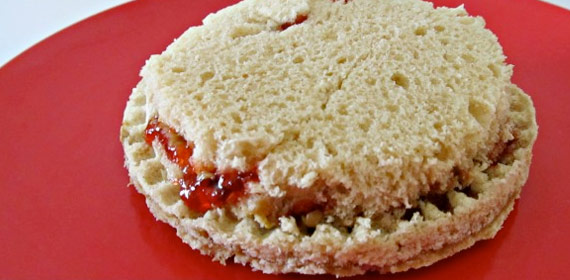
My kids absolutely love those Uncrustable sandwiches sold in the freezer section at the grocery store. You know, the cute little round peanut butter and jelly sandwiches that have no crusts. I cannot lie, I enjoy their convenience. What I don’t like are the cost of them, and the fact that they are no doubt loaded with things that I cannot pronounce. I do my best to avoid things I can’t pronounce in my diet. Unless it is in ice cream, of course! I am less discerning when it comes to my ice cream. I digress.I love those frozen sandwiches especially when making my kids school lunches, or when we are on a long road trip. My husband assured me that we could make our own for a much smaller price tag, and he in fact delivered.
I could not believe the simplicity of these things.
You will need:
Bread
Peanut butter (or any nut butter) of your choice
Jelly or fruit spread
A glass drinking cupTo make your sandwiches grab two pieces of bread. Gently put your glass in the center of a piece of bread so you can see where to put your goodies. Spread peanut butter on both pieces of bread in the center roughly the diameter of your glass. Place a small dollop of jelly on one of the pieces of bread. No real need to spread it out. Top the bread with jelly with your other piece of bread. Nothing special here right? You essentially just made a PbJ with stuff only in the center of the bread.
Now, take your drinking glass and cut out the part of the sandwich with the fillings. The act of pushing the glass through will seal your sandwich fillings inside. Pull the remaining bread aside. (I save mine to make homemade bread crumbs, bread pudding, or croutons)
Make as many sandwiches as you need or want. Freeze them for a few hours. They take about 30 to 60 minutes to defrost. It’s perfect to put inside of a lunch box, or picnic basket.
Easy Garlic Vinaigrette

We all know that creamy salad dressings can add a bit too much fat and calories to our diet. Personally I am not a huge fan of most store bought vinaigrette dressings either. Not just unwanted calories, but unwanted other stuff too. Have you taken the time to read those labels? Yuck! So I took the time to come up with a dressing for my salads that my waistline and taste buds could agree on.I needed something quick, easy, and most importantly delicious. Here is where I ended up:
8 tablespoons of extra virgin olive oil (I usually use just a plain flavor, but you can use some fun infused oils too)
1/2 cup red wine vinegar
2 garlic cloves
Pinch of salt and pepperThat’s it. Just blend all of your ingredients in your blender for about two minutes until a pink smooth consistency has formed. You can store your dressing in an old salad dressing bottle that you have cleaned out.
I like to keep mine at room temperature, after all it is just oil and vinegar really. What I love about this recipe is that it is so basic and can act like a fantastic base for more complicated recipes. Blend in a few raspberries for a raspberry vinaigrette. Try a squeeze or two of lemon.
I like lime juice and cilantro added for a cilantro lime version. Absolutely easy, good for you and extremely tasty!
Firework Frosting

The Fourth of July is just around the corner. I have to admit that it is one of my all time favorite holidays. I love the outside, barbecues, swimming, family, friends, fireworks, and of course celebrating our freedom. My family has always done a pot luck style get together. Themed desserts were always my favorite. Red white and blue everything! The blue berries and strawberries that are at their peak make for perfect dessert decorations. Last year however, I wanted to showcase the firework portion of the holiday.When I think about fireworks, I think of beauty, color, excitement, and explosions. How to translate that into food? It has already been done for me. Pop Rocks! Those completely crazy candies that pop in your mouth! I always loved them as a child, and they really do remind me a bit of a fire work.
Pop Rocks pop when they become wet, so using them can be a tad tricky. Baking them into cookies, while colorful, didn’t provide that unexpected explosion I was hoping for. The same result with cupcakes.
Luckily for us though, they work just fine if you use them like sprinkles! That is right, just sprinkle them liberally on cookies or cupcakes that have been frosted.
I usually take normal sprinkles and mix them with Pop Rocks for this application. Mostly because they are easily over looked this way.
When people are expecting normal tasteless sprinkles and get a flavor explosion instead, the reaction is that much more fun.
So I dare you, this forth of July, to surprise your kids and guests by slipping them some fireworks on your cupcakes!
Fish Shticks
Ingredients:
- Canola or vegetable oil cooking spray
- 1 cup whole-wheat breadcrumbs, or ½ and ½ with plain breadcrumbs
- 1 cup whole-wheat cereal flakes
- ¼ teaspoon ginger
- ½ teaspoon garlic powder
- ½ teaspoon paprika
- ¼ teaspoon salt
- ½ cup all-purpose flour
- 2 large egg whites, preferably organic
- 1 pound tilapia or sea bass fillets
Preparation
- Cut your fish into ½X3-inch strips
- Preheat oven to 450°F. Set a wire rack on a baking sheet; coat with cooking spray.
- Place breadcrumbs, cereal flakes, ginger, garlic powder, paprika and salt in a food processor and process until finely ground (or mix well in a large bowl). Transfer to a shallow plate.
- Place flour in a second shallow dish and egg whites in a bowl. Coat each strip of fish with the flour, dip it in the egg and then coat all sides with the breadcrumb mixture. Place on the prepared rack. Coat both sides of the breaded fish with cooking spray.
- Bake for approximately 10 minutes or the fish is cooked through and the breading is golden brown.
Fish Tacos
Lime Cream
1/2 c. mayonnaise1/2 c. sour cream
2 tbsp fresh lime juice
1 tsp finely grated lime peel
pinch of salt
Fish
2 c. buttermilk1/2 c. chopped fresh cilantro
3 tbsp hot pepper sauce
3 tsp coarse kosher salt
1 tbsp fresh lime juice
2 lbs skinless halibut or sea bass, cut into 1/2 x 1/2 inch strips
16 corn tortillas
2 c. flour
Vegetable oil
Fresh Salsa
Guacamole
- Combine all of the lime cream ingredients, whisk, and refrigerate.
- Mix buttermilk, cilantro, pepper sauce, 1 tsp salt and lime juice in a large bowl. Add fish and toss. Cover. Chill for 1-3 hours.
- Preheat oven to 300 degrees. Wrap tortillas in foil and place in oven to warm.
- Whisk flour and remaining 2 tsp salt in medium bowl.
- Add 1 inch of oil to a large pan, heat until thermometer reads 350 degrees.
- Working in batches, remove fish from marinade and coat in flour. Add fish to pan, cover partially, fry until golden brown, turning occasionally. Transfer to a paper towel lined baking sheet to drain and then transfer to oven to keep warm.
- Set up a buffet with tortillas, fish, lime cream, salsa and guacamole.
Frozen Grapes
-
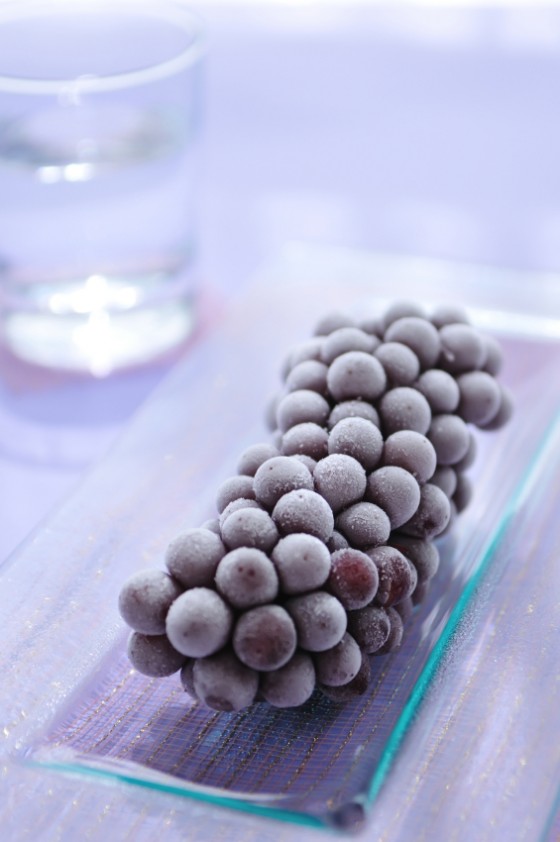
I love cold treats in the summer time. What I don’t enjoy, are the calories that are typically associated with cool summer treats. One of my go to snacks in the warm months are frozen grapes. Red, green, it doesn’t matter. I love them frozen. I remember my grandmother used to make sugared grapes by coating them in sugar before freezing them. They were amazing. Then, just the other day, I had a friend suggest I use sugar free gelatin to coat them. The look on my face must have been priceless, because I stopped everything and went home to give it a shot.
But holy cow, once they were ready it was nearly impossible to stop eating them.
For this I let my kids do all the work. Even better a snack when someone else makes it. We used one pound of red grapes. Removed them all from their stems and placed them into ice cold water. Once they were cold and clean I used a colander to drain the water. Then, easy as pie I began to sprinkle Jello on top. We used tropical punch (sugar free, woot!) on these. Once every grape had a good even coating we put them on a cookie sheet and put them in the freezer. It takes about two hours to get them completely frozen. But holy cow, once they were ready it was nearly impossible to stop eating them. I was a planning on bringing them to a family barbecue tomorrow, but whoops, they are all gone. I am excited to give other flavors a shot as well with green grapes. So simple, and so satisfying!
Frozen s’mores
-
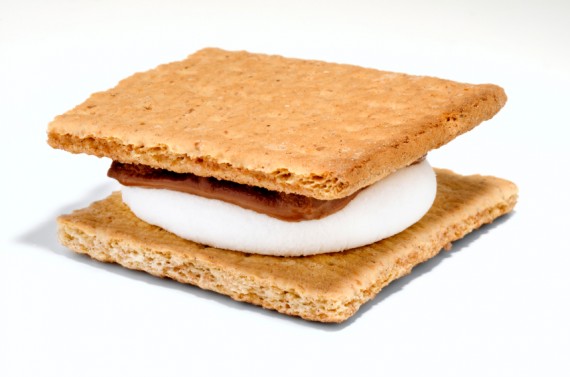
It is outrageously hot out. Hot and dry enough that our area has issued a no grilling ban. That’s right, we aren’t allowed to grill in our own backyards due to the increased risk of fire at the moment. That sort of kills our traditional s’mores night after some good grilled burgers. And to be frank, it’s too hot for that anyway. I bet our marshmallows and chocolate would just melt on their own. Of course, I suppose you’re thinking I could always just make them inside with the broiler. It’s a valid option. If I wasn’t avoiding heating up my kitchen and causing my air conditioner to go out. That’s where this fantastic recipe for frozen s’mores comes in. Creamy, melty, decadent, absolutely perfect for a summer treat!
You will need:
1 1/2 cups graham cracker crumbs (that’s roughly 18 individual squares)
1/3 cup butter, melted
2/3 cup milk chocolate chips (I actually used a combo of dark and milk to make my 2/3 cup)
1/4 cup heavy whipping cream
2 cups mini marshmallows
1 1/2 cups whole milk
1 3.9 oz box instant chocolate pudding
8 ounces Cool Whip, thawed
Graham cracker crumbs for topping, or you could use mini chocolate chips.If you are starting with whole graham crackers throw them into a food processor until they are good and crumbly. Drizzle in the butter and mix until well combined. Don’t try to eat this, as you will not stop.
Grab your cupcake pan and put in cupcake liners, then give each a spray of nonstick spray. Divide the crumbs into each cup as evenly as possible. I used one of my kid’s cups to really squish them down to solidify into the crust. The people who make graham crackers should really just start making them in disk shapes for for me.
Mix your chocolate and cream into a bowl and begin microwaving for ten to twenty seconds. Stir, and repeat until you have an oozy yummy, hot chocolate mixture. Spread the chocolate onto of the graham cracker crusts. I used a spoon, but the original recipe suggested using a pipping bag, or Ziplock with the tip cut off. Do what makes you happy.
Spread out your marshmallows on top of the chocolate and graham crackers. Yum. Set all of that aside to firm up a little. Mix your milk and pudding mix on medium speed for 2 minutes and then fold in 1/2 of your Cool Whip. Try really hard not to eat all of this. Spoon your pudding mixture on top of the marshmallows. Once you got it all in, pick up and gently tap the cupcake pan on your counter. That will help your pudding get into all the nooks and crannies between the marshmallows. This will also help to level everything off. Freeze for at least four hours, but over night seemed to be perfect. When frozen allow it to sit at room temp for about five minutes to loosen from the cupcake pan. Pull them out and pipe the rest (or spoon if you are lazy like me) on top. Then sprinkle with your graham cracker crumbs for an extra dose of pretty. Fun with Pancakes
-
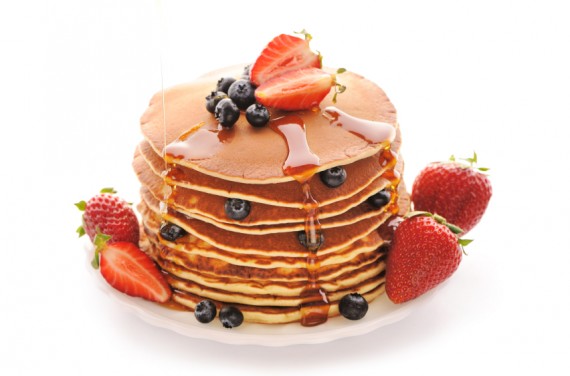
It seems that all kids like pancakes for breakfast. I can’t blame them, a good, fluffy pancake is amazing. I like to jazz up my pancakes every now and again to keep things fresh and exciting. A super easy way to do this is to add fresh fruit to your pancake batter. Our favorite to add is apple. We like to slice it thin and dip it into the pancake batter then toss it onto our griddle. If you do it right you end up with a little ring of pancake and apple, that is fantastic. Otherwise I like to chop the apples into small bite size pieces and mix them in. The heat of the griddle cooks them perfectly.
I like to jazz up my pancakes every now and again
If you are looking for something extra special, try cooking your apples in some butter and brown sugar before mixing them into your batter. Now, I know that apples may not be your thing. What about adding in some black berries? Your kids will get a kick out of the color your pancakes will turn. Or the ever popular blueberry? Okay, so maybe you don’t have time in the morning to whip up a fresh batch of pancakes. It happens. Think about serving your pancakes with fresh fruit and a dollop of whipped cream in stead of the super sugary syrups? You can also live on the wild side like my family and put peanut butter before the syrup. At least this adds some goodness from the peanut butter. Even better if you choose a natural unsweetened variety.
Ginger Snap Cupcakes
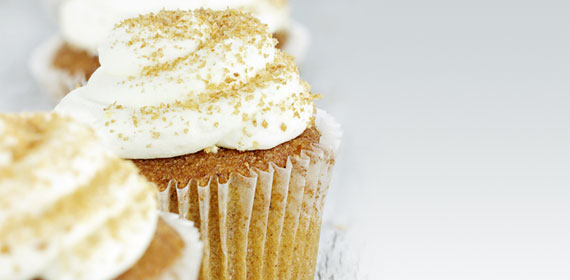 Nothing says fall like a ginger snap, right? The smell, the snappy spicy cookie just screams cold weather. Makes me think of reading next to the fire. But here’s the thing, I love cupcakes. And we all know that cupcakes are the latest trend, so I thought to myself, lets make a ginger snap cupcake. Oh. Yeah. That’s what I’m talking about. A spicy, snappy cupcake covered in a dollop of cream cheese frosting.
Alright, no more talking, lets get to baking!
Your ingredient list:
2 cups all purpose flour
1/2 teaspoon salt
1 1/2 teaspoon baking soda
6 tablespoons unsalted butter, softened
1 cup dark brown sugar
1 tablespoon ground ginger
2 teaspoons cinnamon
1 teaspoon cloves
1/4 teaspoon black pepper
1/2 – 1 teaspoon cayenne pepper
1 egg
1/4 cup molasses
3/4 cup milkPreheat your oven to 350 degrees. Line your muffin tin with cupcake liners.
In the bowl of your stand mixer, cream the butter and the sugar until nice and fluffy. Add in the egg, and mix until well incorporated. Add your spices. Smell the snappy goodness. Pour in your molasses, mix it all in.
Add your salt and baking soda followed by half of the flour mixture. When that is completely mixed in add the milk. Mix some more. Add the remaining flour. Mix one more time.
Bake for 15-20 minutes
Allow them to cool and frost with the following dreamy frosting.
You will need two bricks of cream cheese (approx 12 ounces each) well softened.
1 1/2 powdered sugar
2 teaspoons of vanilla
1 cup of heavy whipping cream. That’s right, cream.Beat your cream cheese and get it good and airy. Mix in the powdered sugar, and cream them together. Get the mixture super fluffy. Set aside.
Grab your cream and whip it, whip it good (sorry, I could not resist.) Whip it until you have good firm peaks. Then add your cheese mixture to your whipped cream and mix it together. Do not eat with a spoon. Spread it on your cupcakes and enjoy!
Gingerbread House Alternatives
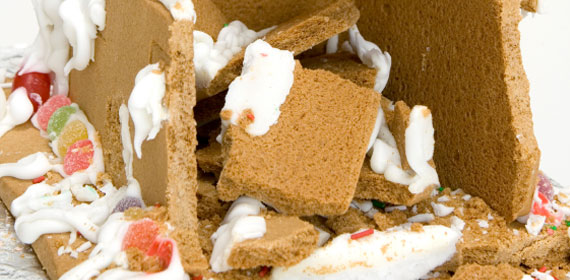 Every year I get super excited and plan to make some epic gingerbread house with my kids. Every stinking year (I’m a little discouraged in case you couldn’t tell). And every year my gingerbread houses are more of a huge epic failure. I have purchased kits, I have house shaped molds yet they never stay together the way they are supposed to or the way they look on all those cooking shows. It is infuriating! This year, I have derived to try something new and hopefully more manageable. I got these ideas from other moms, who like me, got frustrated making gingerbread houses. My favorite idea was to skip making houses altogether and instead make a Christmas tree.
This year, I have derived to try something new and hopefully more manageable.
To make your Christmas tree all you need are waffle cone shaped ice cream cones, some frosting, and small candies to decorate. Spread the frosting all over the cone, including the bottom. Press the cone onto a plate. When the frosting dries, it will stick to the plate really well and not fall over.
While the frosting is still soft allow your kids (or you, if you’re like me and love these types of projects) to decorate your trees. You can use a piping bag, or in the interest of time, buy green and red frosting in the can or tube made for writing to make garlands on your trees. Super easy, super cute!
Another fun way to skip the gingerbread, is to use graham crackers. Two full sheets of graham crackers (four square sized crackers) can easily be put together to make the base of a house. Use frosting as the glue, as always. Another two square Grahams can make a roof on your house. Let the frosting glue set, then decorate your house as usual.
The newest and possibly the most fun you can have making a non-gingerbread gingerbread house is to use rice crispy treats. Make a batch with your favorite recipe. Then once cooled, they are fairly easy to mold. My kids love helping in the molding phase, shaping their own houses just like with play dough. And again, decorate as usual. A lot fun, very manageable and always a treat!
Halloween Themed Party Food
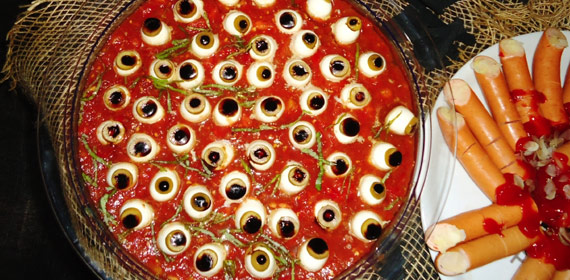
Halloween is awesome, am I right? It is one of my family’s all time favorite holidays. I love it even more now that I have children with which to share it.
Each year we have the tradition of making Halloween themed foods. My kids all delight in athe snacks being a bit more gruesome than normal.
Our first snack up is severed fingers.To make these you need hot dogs. Cut the hot dogs in half. On the rounded edge sliver off a small piece to make fingernail beds. Use a small knife to make slits on the hot dog to resemble knuckles. Cook your hot dogs as your normally would. There you have severed fingers, best served with blood (also known as ketchup).
You can also make these fingers using string cheese, although they don’t look quite as realistic. Both taste good though.
Another favorite would have to be Twinkie mummies. To make your mummies you will need Twinkies, sucker sticks, and white melting chocolate.
Melt your chocolate in the microwave or with a double boiler. Push the sticks into the Twinkies. Dip the Twinkie into the chocolate and turn to coat. Place on a parchment paper lined surface to set. When you have finished coating all of your Twinkies drizzle more white chocolate across them using a fork. I just dip the fork in the melted chocolate then drizzle it across each Twinkie. This makes the Twinkie look like a mummy with linen wrappings. Place candy eyes on your Twinkies and you are in business.
No Halloween meal would be complete for my family with out a healthy serving of kitty litter. Sound discussing? Good, that’s the point!
To make your “cat droppings” you will need to make chocolate drop cookies.
1 stick of butter
2 cups sugar
3 tablespoons cocoa powder
3 cups oatmeal
1/2 cup creamy peanut butter
1/2 evaporated milkBring the butter, sugar, evaporated milk, and cocoa to a boil in a medium sized sauce pan over medium heat. Boil, while stirring, for one minute. Remove from the heat and stir in the peanut butter and oatmeal.
Portion out tablespoon sized scoops of cookies, and use your hands to shape them like cat poo. Place them on parchment paper to finish cooling and to completely set. Now you have a plate full of very yummy cat droppings.
To make your cat droppings look more real, you will of course need some kitty litter. For this step buy a new inexpensive kitty litter tray and scoop. (You can use another serving bowl, but it kills the “authenticity”). Pour in one full box of Grape Nuts cereal. Now strategically place your cat poop in the cereal. I like to have some of them partially buried, and others right on top.
My kids get a scoop of the cereal litter and one cat dropping cookie for breakfast nearly every Halloween. And it never ceases to gross them out.
Healthy Peanut Butter Breakfast Cookies
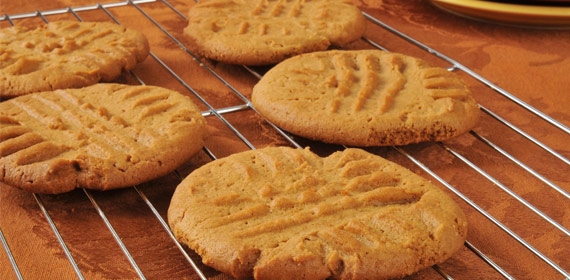
Some mornings are absolutely crazy for me. Between getting up and dressed myself and then getting the kids up and ready to go I don’t have time to get myself a good breakfast. I absolutely know the importance of a good breakfast, but business happens. Some days I will just grab a protein shake and go, but to be completely honest, I prefer to chew my calories rather than drink them. For some reason when I actually eat my food I feel more satiated. I could never survive on any sort of liquid diet. Let’s hope I never have my tonsils out.About once a week I will take the time to bake some breakfast cookies so that I have something to grab on those crazy mornings. They also double for a fantastic snack that I can take with me when I am out and on the go.
Ingredients:
2 ripe bananas
1/3 cup peanut butter
2/3 cups unsweetened apple sauce
1/4 cup chocolate or vanilla whey protein powder
1 1/2 cups quick oats
1/4 cup chopped peanuts, unsalted
Chocolate chips to garnishAdd the bananas, peanut butter, apple sauce, and protein powder into your food processor. Blend until creamy.
Mix the banana mixture and the oats and peanuts in a large bowl. It will begin to feel like a cookie dough.
Scoop the dough out and place onto a cookie sheet.
Use a spoon to flatten your cookies and then sprinkle with a few chocolate chips.Bake your cookies in a preheated 350 degree oven for about 25 minutes or until they are golden brown and fragrant.
Allow to cool and then enjoy when you need a good flavorful blast of protein. If not for breakfast, then they also make a great post work-out recovery snack. And the kids never have to know that they’re really good for them!
Home Made Taco Seasoning

Who doesn’t love taco night? Around here it is one of the more popular things that I make for my family to enjoy for dinner. Maybe it’s the fact that my kids get to dish themselves up and decide what they want on their tacos. Maybe it is because there is an abundant amount of cheddar cheese. Or maybe, just maybe, it’s because tacos just taste good!Making your own tacos is generally pretty easy, especially if you purchase a seasoning packet. However, due to the amount of sodium and other unpronounceable ingredients I opt to make my own taco seasoning.
I think that it tastes much better than what you buy at the store, and it does not take that much more effort. My favorite part about it is that I can control the amount of flavors for our dinner. I control how spicy it is, as well as how strong the flavors are.
Most likely you have all of the needed spices in your pantry already.This recipe was adapted from Alton Brown. My main changes were to add some garlic powder, and to use water instead of beef broth when making my taco meat.
Here is what you do.
2 Tablespoons Chili Powder
1 Tablespoon of Cumin
2 teaspoons cornstarch
2 teaspoons salt
1 1/2 teaspoons hot paprika
1 teaspoon coriander
1/2 teaspoon cayenne
2 teaspoons garlic powderMix all of the spices together. Smell it’s taco-y goodness.
To make your tacos brown 1 1/2 pounds of ground meat. Ground beef, pork, and/or ground turkey work as well. I imagine even ground chicken could work too. I’m a traditionalist, so I shoot for the beef or pork. When your meat is browned all the way, drain it. Return it to the pan.
I sometimes add a diced onion at this step. When the onion is done cooking, throw in your taco seasonings and 2/3 cup of water. Again, you can use beef broth, but I don’t find it to be necessary.
As it cooks the sauce will thicken and stick to the meat really well.
That’s it! You have made your tacos. Use hard or soft shell taco, cut up your vegetables, put out the shredded cheese and load it up to capacity as you normally would.Homemade Apple Sauce
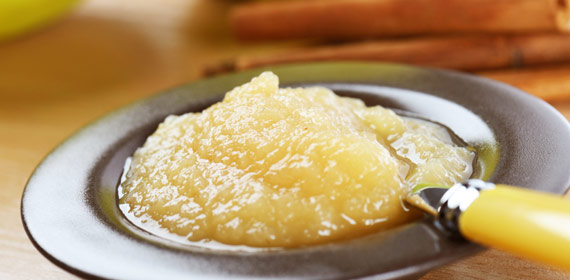
My kids do not always make the best decisions about food. If they had their way they would eat pizza, macaroni and cheese, and peanut butter and jelly sandwiches every meal.They might occasionally spring for some Lucky Charms, or chicken nuggets. Healthy eaters, they are not. At least when left to their own choices. Luckily, all three of my kids, and my husband to boot like apple sauce.
For me, applesauce is one of those things that I cannot stand buying. Sure, it’s convenient, especially for school lunches, but for eating here at home it’s homemade all the way. It is so unbelievably easy. I got my recipe and adapted it from Alton Brown. His recipe is pretty perfect as is, but I don’t always have the same type of apples on hand. And quite frequently, I don’t have the booze he calls for either. Either way it is good.
You will need
Six apples (I used three Granny Smith, and three Fuji). I have made this several times, with lots of different apples. They have all been good.
1 cup apple juice
2 tablespoons butter
3 tablespoons honey (I have also subbed in brown sugar with good results)
1/2 teaspoon cinnamonPeel and core all of your apples. Chop them into big chunks.
Put all of your ingredients into a microwave safe bowl. Cover, but leave one corner open to allow for steam. The first time I forgot to do this and nearly had a heart attack when the lid blew off of the container. Whoops.
Microwave for 10 minutes.
Carefully remove from the microwave, this stuff is hot, and there is lots of steam.
Using a fork (or a potato masher, or a food processor depending on your desired results) mash everything together until you like it’s consistency. I prefer the apple sauce just this side of chunky. So I use a fork. But if you like it smooth, use your processor to get the job done.
I serve this warm, usually with pork or turkey. Then I refrigerate the remainder and enjoy it the rest of the week. The best part about this recipe is that it is totally easy to double or triple. My friends are always impressed when I whip out the homemade apple sauce!
Homemade Bread Your Kids Can Make
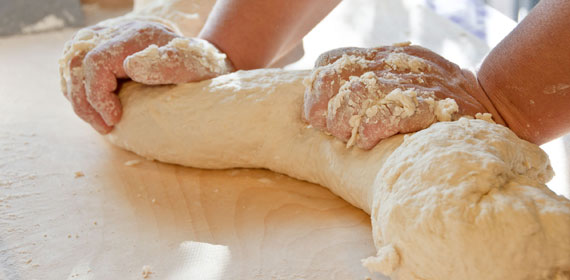
In an effort to ensure that my kids are able to cook and feed themselves once they move away from my home I have been doing my best to teach them basic cooking skills. Tonight we mastered a basic bread recipe. One that was fool proof, pretty much can never go wrong, and requires no kneading. Amazing right? For the longest time I avoided making breads because I just knew that I hated kneading. Never mind that I had never even tried kneading, I just didn’t like the idea of kneading.
Here is the super simple recipe. Be sure to help the kids measure, although admittedly this is a very forgiving bread.1 packet of yeast
2 cups warm water
1 tbsp sugar
4 cups flour (we have used many different varieties of flours here, from straight whole wheat, regular all purpose, to bread flour and every combination thereof. Our favorite combo is 3 cups whole wheat and 1 cup bread flour, but use what you have. It will still be yummy.)
1 tbsp salt
4 tbsp melted butter
1 tbsp chopped fresh rosemary dried works well here too
Olive oil
Corn mealBloom your yeast with the warm water and the sugar for about ten minutes or so. When the yeast mixture is good and bubbly add the flour and salt and combine into a sticky dough. (You can sometimes mix in a cup or so of cheddar cheese for variety!) Cover with a damp towel and allow to rise until doubled in size, about an hour to an hour and a half.
Coat your baking surface with olive oil and a sprinkle of cornmeal.
Divide your dough in half. You can freeze half, or make both loaves now. We eat a lot of bread so always make both. With floured hands shape your dough into domes. Place them on your prepared baking sheet. Cover again with a towel and allow to rise for one more hour.Preheat your oven to 400 degrees. Brush your melted butter over your dough and sprinkle with rosemary and additional salt. Bake your bread for about 25 minutes. If you’re like me those 25 minutes will be painful. Waiting for fresh baked bread is hard.
When your bread is done allow it to cool or at least until you don’t burn yourself when you try to eat it.
Homemade Butter
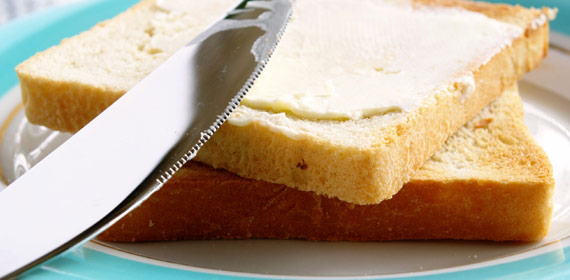
We are nerdy homeschoolers. That means that we read a lot of books, we ask a lot of questions! and eventually we do a lot of projects and experimenting. My second grader has been working her way through the Little House on the Prairie books. One afternoon she asked me if butter really came from cows. We watched several YouTube videos of milking cows, and even a few on churning butter. My kids were fascinated with the old butter churns and what a laborious process the whole thing was. Inevitably, they asked if we could make butter. I remember as a kid, making some in a Tupperware container and lots of shaking. I seem to recall it taking hours. Then I found, on the Internet, people making fresh butter with their stand mixers.This happy experiment was so easy, and the results were amazing. I’m not sure I had actually tasted fresh butter before. Which is amazing, considering I recall making some as a kid (perhaps I failed to actually make butter?) and that I lived in a huge dairy town growing up.
I am so glad we tried this out.
Your shopping list is huge! You need, cream and salt.
That’s it folks, two ingredients for your homemade butter.
I used one full quart of heavy cream and a teaspoon of salt. Both ingredients go straight into your stand mixer. If you have the splash guards for your mixer you will want to use them! Using the paddle attachment, turn that sucker on high.
And now, unlike butter churners of yore, you watch instead of work. Your cream will thicken into beautiful whipped cream. Yum. But then, it begins to congeal, and separate. This is where I got worried. I thought I was doing something wrong. Don’t be like me, and just realize that your butter is separating from your buttermilk! So not only do you get fresh butter, but you get fresh buttermilk too. Can you imagine your breakfast tomorrow, buttermilk pancakes and fresh butter?
Keep churning that butter until it forms into a clump and sort of sticks to the paddle.
Using a colander separate your butter from your butter milk. Put the buttermilk into a container and into your fridge.
Now you need to use your hands and squeeze out any remaining buttermilk in the actual butter. You can also use the back of a spoon to press it out.
When you are finished you can shape it into a stick, or put it into a container. Fresh butter should always be kept in the refrigerator.
Before chilling consider adding fresh herbs, fruits, or garlic for some amazing flavored butter.
Homemade Chocolate Syrup
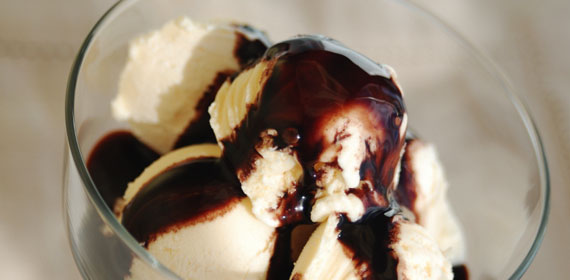
My kids love chocolate milk, but I love it even more. I am not ashamed to admit that. But recently I have been trying to cut back on processed foods, which became a problem when I realized that chocolate syrup is in fact processed. So, what is a girl with chocolate milk loving kids to do? Make my own of course. It has become my favorite thing to do, think of the most ridiculous junk food stuff and find a way to make it at home in a slightly more healthy fashion.It turns out that making your own chocolate syrup is super easy. I mean, super duper easy. And fast too. What is even better, is that you end up with a more velvety smooth syrup, that potentially has a more intense chocolate flavor. The flavor depends on the brand of cocoa you choose. You might need to play around a little bit until you find the type of cocoa that makes the best flavored syrup.
You will need:
1 1/4 cup sugar (think organic sugar or equivalents that are better for your options)
1 cup unsweetened cocoa powder
1 cup water (filtered if you have it)
1/2 teaspoon salt (please don’t skip the salt!)
2 teaspoons of vanilla extractPlace all ingredients except the vanilla extract into a medium sauce pan. While whisking, bring the mixture to a boil. Try to break up any clumps of cocoa or sugar while you stir. Once it begins to boil continue to stir frequently. After about three minutes the mixture will begin to thicken. Avoid tasting at this time,unless you fancy the idea of a burned tongue.
After it has thickened remove it from the heat and let it sit for about five minutes. Stir in the vanilla.
Your syrup will last covered in the refrigerator for one month, however, mine is usually gone long before then.
If you are using the syrup for something other than chocolate milk you have the ability to be quite creative.
Instead of adding vanilla extract you can add other extracts to change your flavor profile. Peppermint extract for a chocolate peppermint sauce. Cayenne for a spicy chocolate, and so on.Homemade Cookbooks
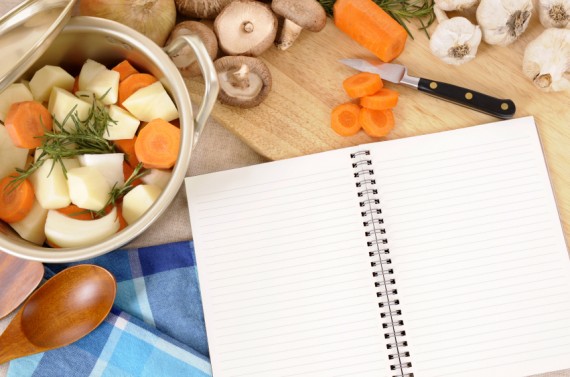
In the last few months several of my cousins have decided to get married. I love the ideas of gift registries, and browsing all of the things that they have picked out to start their new life together. It’s almost like taking a tour into their dream home.
There are times however, when creativity strikes me and I would much rather give something creative. Most of the brides I knew didn’t know how to cook. Cooking is such a fun thing for me, I thought that I should do my best to give each couple the gift of cooking. I know what you’re thinking, “But isn’t buying someone cooking classes considered rude?” I don’t know about all that, but in order to stay on everyone’s Christmas card list I refrained from the formal lessons. Instead I made them cookbooks.
It was extremely fun adding in my own commentary and little jokes along the way.
First I sent a secret email to their parents for a list of dishes that each family enjoys. Things like grandma’s cookies, or aunt so and so’s burritos. Then I added some of my own recipes as well. Then for six months (yes, six months!) Don’t panic if you don’t have that much time. This project could be made much more quickly if necessary. It all depends on how many recipes, and how fast you cook, type, and photograph. I spent extra time assuming that I was teaching someone with absolutely no clue on how to boil water. I did it in a teasing fashion so they understand I wasn’t being condescending, but that I was also not assuming that they knew everything.
I made each dish and photographed individual steps along with the final presentation. After enjoying each meal I typed up the how to and any helpful hints I could add. It was extremely fun putting in my own commentary and little jokes along the way. It was a great way to expand my own recipe database, experiment with new foods and make something memorable for people I love.
Once you have typed and photographed everything it is time to print it out. Just about every photography website out there offers bound photo books. I think I ended up spending about $40 a book which wasn’t too bad for a homemade wedding present filled with love.
Homemade Salted Caramels
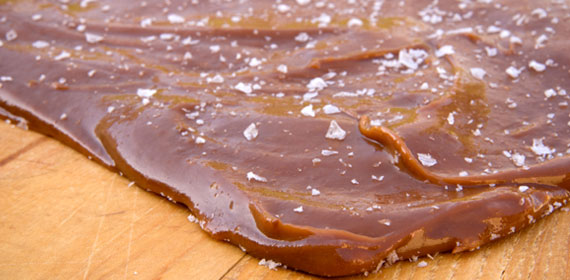
With the holidays right around the corner it is about time to start thinking about your Christmas, Hanukkah, Kwanzaa, Boxing Day (celebrated in England) and other holiday gifts. I do my best to give out as many homemade treats as I can muster. And nothing seems as impressive as a homemade candy. Toffee, taffy, and caramels. Some of my favorite things! Nothing beats a good soft and chewy salted caramel.Here are the ingredients that you will need:
1 can sweetened condensed milk
2 cups of granulated sugar
1 cup unsalted butter
1 teaspoon kosher salt
1 1/2 cups light corn syrupIt also helps to have a candy thermometer, but it is certainly possible to make these without one.
Grab a nine by thirteen pan and heavily butter the bottom, sides, and corners. Then set aside.
Put all your ingredients into a heavy bottomed pan. Turn your heat to medium. Continuously stir the mixture while it comes to a boil. It’s will take what feels like a long time, but keep stirring! Be sure to not scrape any crystals from the side of the pan back into the boiling sugar mixture. Just keep stirring, and stirring, until the molten sugar turns the color of a light caramel. You can also check the texture by placing a small amount into a glass of ice water. The candy will stay in a ball as it sinks, but flatten into a disk like shape when it hits the bottom. Or you can check your candy thermometer for 240 degrees.
Carefully pour your burning hot goodness into your buttered 9×13 dish. Allow it to cool for ten minutes and then sprinkle with kosher salt.
Continue to cool completely to room temperature.
Grab a knife and run it along the edges of your fully cooled caramel. Just get it loosened. Then you should be able to turn the giant sheet out onto a cutting board. I prefer to use a pizza cutter to slice my caramels into bite sized morsels. Wrap with parchment paper and place it into pretty tins for a fantastic homemade gift.
Homemade Thin Mints
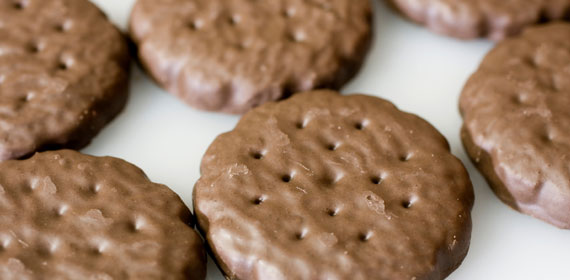
I love Thin Mint cookies. They might possibly be my all time favorite cookies. In fact, I have been known to buy enough boxes from my local Girl Scouts so that I can freeze some to make them last longer. Actually, who am I kidding, freezing them doesn’t help. I still eat them by the bucketful. They might even be tastier when frozen. But what is a Thin Mint lover supposed to do when it isn’t Girl Scout cookie “season?”
You make your own, of course!
This recipe is adapted from Six Sisters Stuff
Cookie Ingredients
1 cup softened unsalted butter
1 cup granulated sugar
1 heaping teaspoon of vanilla extract
1 cup unsweetened cocoa powder
1 teaspoon kosher salt
1 1/2 cups all purpose flourBeat butter until it is pale yellow and fluffy. Carefully add in your powdered sugar. If you add it too fast you will poof sugar all over yourself. Ask me how I know. Anyway, mix the butter and sugar well. Add in cocoa powder, salt, and vanilla. Mix well. Add the flour in two batches, being sure to mix well between each. Your dough will be a bit crumbly, and resemble a sugar cookie dough. Except it will be brown and chocolatey. Chill it in your fridge for about half of an hour.
Sprinkle your work surface with cocoa powder (just like you normally would with flour when you roll out dough). Knead the dough until it is soft enough to roll into 1/8 of an inch.
Use a round cookie cutter to cut out your cookies and place it on a parchment lined baking sheet. Bake at 350 for 9-10 minutes. Remove the cookies and place them on a cooling rack.
Wile the cookies are cooling it is time to make the minty chocolate coating.
Mint Chocolate Coating
3 cups semi-sweet chocolate chips
2 1/4 peppermint extractMelt the chocolate in a double boiler (or in your microwave if you’re so inclined. For me, I prefer the old fashioned way.).
Stir in the extract until velvety smooth.Now the fun part. Dipping the cookies. One at a time dunk the cookies into the warm chocolate mixture. Use a fork ( not your fingers!) to flip the cookies and to remove them when they are completely covered in chocolate minty goodness. When covered place them on parchment and allow for the chocolate to set. Absolutely place them in the refrigerator to hurry the process if needed.
Homemade Vanilla Extract
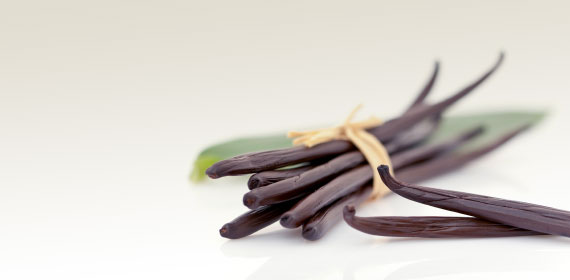 This time of year is full or parties. Christmas parties and New Years parties are the two biggest. Of course you cannot go to a party without offering a hostess gift right? It seems that the normal hostess gift these days is a nice bottle of wine. I have no issues with that, but I like to be a bit different. This year I made some vanilla extract. It was so easy to do.
You need:
- Vanilla beans
- Vodka (roughly 375ml per bottle you plan to make)
- Fancy bottles that seal up well. Make sure they are big enough to hold 375mls or so (I got mine at the local craft store).
Pour your vodka into the bottles. Cut your vanilla beans in half lengthwise. Place one in each bottle. Seal them up, put a sticker and a bow on and you are good to go. Really?! And I’ve been paying all this money for those tiny little bottles? Ouch!
Ideally you would make these at least a few weeks in advance. But if you are like me and are running behind on life, just add a note giving the recipient a date of when the extract will be ready. The cool thing about this, is truly the longer they wait to open it the better it will be. You can make them this year to give out next Christmas and call it “aged” vanilla extract. How fancy does that sound?
For a nice touch, give a few recipes that would really benefit from some good vanilla extract. Cookies, cakes, ice cream, whatever you think works the best.
Homemade Yogurt
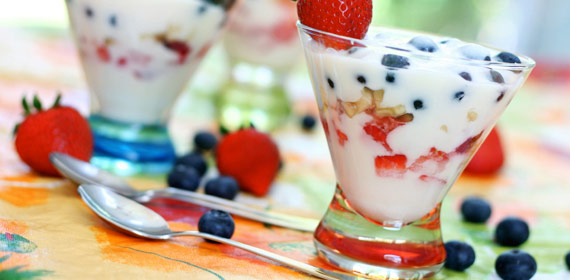
My kids love yogurt. They would eat it with every meal if they could. Sadly for me, the cost of yogurt sure adds up. Especially if you’re trying to buy good quality yogurt for a big family. Did you know, that it is possible for you to make your own yogurt at home, using your crock pot? Well, it totally is, and I am going to tell you how.You will need:
A crock pot
A candy thermometer
1 cup of plain yogurt with live cultures (once you have made this once, you can use your yogurt as the starter for the next batch. I prefer to use Stoneyfield plain whole milk yogurt.)
1 gallon of whole milkThat is it!
Here is my method:
Place all of the milk into the crock pot and heat until it reaches 180 degrees. Mine takes about four hours on high to get there.
Turn the crock pot back off and cool until 110 degrees. Another four or so hours here.
When your milk is 110 degrees you can mix in the cup of yogurt starter.
Cover the crock pot, and wrap the whole thing in a big towel. Let it sit overnight (up to about 12 hours). When you wake up you will have a big batch of fresh homemade plain yogurt.I know, awesome right? At this stage I like to flavor and sweeten our yogurt. The best part about this is you can use any Sweetener you choose. Stevia, honey, regular sugar. Whatever. You can make this fit into your health needs. Plus you will know exactly what your kids are eating!
For vanilla yogurt I add vanilla extract and sugar to taste.
If you prefer it thicker, you can strain your yogurt using a sieve and a coffee filter.
If you like fruit in your yogurt you can make a batch with some fresh jam.
Get creative, and get making some yogurt!
How to Make Chocolate Covered Strawberries

The Valentine holiday is notorious for chocolate. I mean the two are practically synonymous. Even though my husband and I traditionally don’t go out on Valentine’s day we do our best to spoil each other. One of my favorite ways is to make him a home made chocolate covered fruit. My favorite of course is the chocolate covered strawberry, but any and all fruit seems to taste darn good covered in chocolate.You do not have to be intimidated by chocolate covered fruits, they are unbelievably easy to make on your own, and they hardly take any prep work. And of course, do not forget that they are incredibly tasty. They could be considered half way healthy too, I mean eating the fiber in the fruit with the chocolate must be better than just eating the chocolate itself. At least, this is what I am going to continue to tell myself as I plan to make these for my husband this year.
The first thing you want is to find good fruit. Something good and ripe. For strawberries I try to find some without any green. Bananas are best when the skins are bright yellow, without any brown. Bananas are indeed sweeter and more ripe when they begin to get brown streaks on their skins, but they become too soft at that point. Grapes are perfect when they are firm. You get the idea, fruit that is in season and ripe.
Prep your fruit by giving it a good cleaning. For strawberries, remove the hulls if you desire. Or you can leave them on for a more gourmet look. I like to core and slice apples, then cut each slice in half to make them more of a one bite deal. Place tooth picks into your pieces of fruit so they are easier to dip into the chocolate later.
Next paper dry your fruit. You want them to be nice and dry because water in the chocolate makes for a disaster. Okay, maybe not a full blown disaster, but it surely makes it harder to work with and could possibly make the chocolate seize up on you.
Now onto the chocolate. You can actually purchase chocolate specifically made for you to dip fruit into. You microwave it in its little container then dip in your fruit when it is nice and melted. That is a perfectly acceptable option! However, for me, I like being able to tell my husband that I slaved in putting in the extra effort for him.
You will need 16 ounces of good chocolate. Keep in mind that the better your chocolate, the better the chocolate covered anything will taste. You can use dark, milk, a combination, whatever you prefer.
Using a double boiler is the most reliable way to melt chocolate. If you don’t have one, don’t worry you can rig one up pretty easily. Grab a pot half full or water and a glass bowl that fits into it. Turn on your stove to medium. Put your chocolate and two tablespoons of shortening into the glass bowl and stir while it melts.
Once it is all melted you are ready to dip in your fruit. Each 16 ounce batch of chocolate will cover about one pound of fruit. Dip your fruit into the chocolate, turn to coat, then place onto some wax paper to cool and set. Don’t forget to remove your toothpicks. Repeat until you are out of fruit or chocolate.
For extra fancy fruit, melt some white chocolate (no shortening needed here) and drizzle it on top of your fruit after they have been dipped. There you have it, chocolate dipped goodies. Don’t stop at fruit either. You can dip pretzels, chips, crackers and just about anything!
Ice Cream In A Bag

If you have school aged kids or even preschoolers, and those kids watch any TV you have likely heard about Ice Cream Magic. Basically it is a little contraption shaped like an ice cream cone that makes about a half cup of ice cream. You freeze part of it, add your ingredients and then shake. My kids have been asking for one of these contraptions for weeks. Frankly, there is no way I am going to shell out fifteen bucks for one of these things. Call me a Scrooge, but I’m just not going to do it.However, if my kids want to make some homemade ice cream I am all for that. I know what you’re thinking, most ice cream makers are not as much fun. Never fear, you can put your kid’s summer energy to work by hand “churning” ice cream using plastic bags.
You need your obvious cast of characters:
Gallon zip top bags
Quart zip top bags
1/2 cup of half and half
1 tablespoon of sweetener (more or less to taste) I use regular white sugar
1 teaspoon vanilla flavor
One decent squirt of chocolate syrup (totally optional, but extraordinary taste!)
Ice
Five tablespoons Ice cream salt
A towel or pair of gloves to keep hands warm.Pour your half and half, sugar, vanilla, and chocolate syrup into the quart sized bag. Zip it up. Shake it to mix. Really make sure it is zipped up well. Or you will end up with a big mess. Don’t ask me how I know this. Okay, that is your ice cream base. I would imagine that you could use any ice cream base that you prefer. More elaborate ones, or simpler ones like a mix. Just don’t over stuff your bags.
Put the bag of ice cream base into the gallon sized zip topped bag. Fill the larger bag with ice and the ice cream salt. Zip up that bag.
Your final step is to shake! My kids danced, they shook, they wiggled. They complained a little bit about cold hands. I calmly reminded them that cold fingers were well worth fresh ice cream! After about fifteen minutes of constant shaking, you could start to feel the ice cream firm up. You want it to be the consistency of soft serve.
When you finally reach that elusive moment of ice cream it is time to eat! Pour it into bowls or eat it straight from the bag. I will not tell. If you prefer a more hardened texture you will have to put your ice cream into a container and back into the freezer for a few hours. No matter how you eat it though, it is a great summer afternoon activity with a sweet reward.
In N Out Copy Cat
 I was born and raised in Southern California and as an adult made the (crazy) decision to move east of the Mississippi. And one of the many things I miss is In N Out. I will not lie to you, on our last vacation back home we ate at In N Out at least four times. There was one fateful day when we drove through twice. I am not ashamed, not even one little bit.
There was one fateful day when we drove through twice…
I have spent the last six years living here in the south attempting to convince people that In N Out does in fact make the best drive- through burger in the entire universe. And of course, I have been doing all in my power to replicate the deliciousness of their Double Double.
It all started when I was pregnant, and those nasty pregnancy cravings told me that I needed In N Out. I needed it as much as I needed air, and water.
Maybe even more than water.
Let us get down to business.
First up is the secret sauce:
1/3 cup mayo
2 heaping tablespoons of ketchup
2 teaspoons sweet pickle relish
1 teaspoon yellow mustard
1/4 teaspoon smoked paprikaMix everything together and refrigerate until ready to eat!
Now for the burgers themselves. When I think about a good In N Out burger and why I think it is the tastiest around, I usually dream about the cheese to meat ratio. Their patties are thin, and seared really well, which means high heat. So heat your grill, or iron skillet up high.
1 pound ground beef. The higher the fat content the better.
1 egg white
1/2 cup minced onion
1/2 teaspoon garlic powder
1/2 teaspoon pepper
Three dashes of Worcestershire sauceMix all the ingredients in a large mixing bowl. Shape into six patties. Nice and thin and slightly larger in diameter than the size of your hamburg buns. Sear on each side, for about two to three minutes each side. For the last minute add a slice of American cheese to each patty. When the patties are finished cooking make stacks of to patties each. The build your burger!
To assemble the burgers you will need:
Fresh tomato slices
Iceberg lettuce
Onion slices
Seedless burger buns
Secret sauce
Two patty burger stacks
ButterSpread some butter on the insides of your buns, toast them until golden brown.
Slather on some secret sauce on the top inside of the bun
Place the meat stacks onto the bottom bun, top with onion, tomato,and lettuce, and finally the top bun.I am aware this is not exact, but at least it helps this Southern California native survive a little easier.
Magic No-Mess Frozen Pops

My mom used to make these Popsicles while I was growing up. We called them magic Popsicles because they didn’t really drip and make a mess like other Popsicles. Of course, now that I think about it, perhaps they didn’t drip simply because we ate them so quickly. They have a slightly different texture than you will get in a regular Popsicle, but it is a good one.
There are two ways to make these bad boys, one is the traditional way like my mom and grandma made. The other is the less sweetened lower sugar way that I am sure will appeal to many.
The original pops were made using:
1 packet of unsweetened Kool Aid
1 3 ounce box of Jello (in a coordinating or complimentary flavor to the Kool Aid)
3/4 cup sugar
2 cups boiling water
2 cups very cold waterGet your two cups of water boiling.
In a large bowl mix the drink mix, Jello, and sugar together.
Stir in the boiling water and mix until everything has dissolved.
Mix in the cold water.
Immediately pour into Popsicle molds and freeze for a minimum of four hours.
I find this way to be cloyingly sweet. This is how I got the recipe from my mom, but when I make it I cut back on some of the sugar. That’s just me though.
Alternatively you can skip the sugar and purchase the sugar free versions of the Kool Aid and Jello. I’m not sure what they use to sweeten those these days, but it is an option. You can also sub in stevia or a sweetener of your choice for the sugar in the original recipe. Just remember that each sweetener sweetens just a bit differently so you might have to taste your concoction to see if you have enough. Start small and add until it’s just right.
These Popsicles were a staple of my childhood. Any time one of us had a sore throat we got to enjoy these. They are good enough that I still like them even now.
Meatloaf
Crouton mixture
6 oz croutons1/2 tsp black pepper
1/2 tsp cayenne pepper
1 tsp chili powder
1 tsp thyme
Glaze
1/2 c. catsup1 tbsp ground cumin
dash worcestershire sauce
dash hot pepper sauce
1 tbsp honey
Vegetable mixture
1/2 onion, roughly chopped1 carrot, peeled and broken
3 whole cloves of garlic
1/2 red bell pepper
1 1/2 tsp kosher salt
1 egg
36 oz ground beef
- Preheat oven to 325 degrees.
- Combine all crouton mixture ingredients in a food processor until the texture is smooth and fine.
- Combine carrot, onion, garlic and red pepper in food processor, finely chop.
- Combine vegetable mixture, crouton mixture, egg, salt and meat. Avoid squeezing the meat.
- Put into a 10 inch loaf pan and mold the shape. Flip out onto a parchment paper lined tray.
- Cook at 325 degrees for 10 minutes, then brush with glaze.
- Return to oven at 325 degrees. Done when temperature probe reads 155 degrees.
Minestrone Soup
1 cup onion, peeled & diced
½ cup celery, diced
¾ cup carrots, diced
1 tsp. crushed garlic
½ cup cabbage, shredded
½ cup spinach
1 cup zucchini, peeled & sliced
1 cup string beans
¾ cup cooked bean mix (kidney, brown, lentils, chickpeas, & etc.)
1 cup fresh tomatoes, chopped
2 tsps. salt
¼ tsp. black pepper
1 tsp. oregano
1 tsp. basil
¼ cup parsley flakes, minced
2 tblsps. vegetable oil
2 cups tomato sauce
4 cups water or stock
¼ cup wine
½ cup macaroni
1. In an 8-quart pot, heat the vegetable oil and sauté the onions, celery, and carrots for 10 minutes.
2. Add all the ingredients except for the macaroni, bring it to a boil, and simmer for 30 minutes.
3. Add the macaroni, and cook for another 30 minutes.
4. Check water level during cooking and add if necessary.
Mulligatawny Soup
(makes 4 servings)
4 tsp butter or margarine
1 medium onion, sliced (2 cups)
2 medium carrots, sliced (1 cup)
2 celery stalks, sliced (1 cup)
1 lb boneless, skinless chicken breast, cut into 1 inch pieces
1 tbsp curry powder
2 tbsp flour
2 tbsp freshly chopped ginger
3 c. chicken broth
2 c. water
1 c. coconut milk
4 tbsp. Fresh chopped cilantro
8 lemon wedges
2 cups of hot cooked rice (optional)
- Heat butter/margarine on medium heat in a large pot.
- Add onion, carrot, celery and chicken. Sautee for 5 minutes.
- Add curry powder, flour, ginger and sauté for 1/2 – 1 minute.
- Add chicken broth, water and coconut milk. Stir and simmer for 10 minutes.
- Salt and pepper to taste.
- To serve- if including rice, spoon rice into 4 large soup bowls. Ladel soup into bowls. Sprinkle with cilantro and place lemon wedges on side (add to taste).
No Campfire S’mores
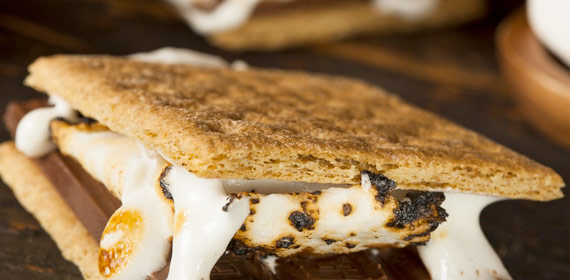
It is still snowing here despite being March, so we have been spending quite a bit of time inside. Still. This feels like the winter that will never end. Trying to keep the cabin fever at bay for me and the kids has been especially challenging. We have done just about every indoor activity I could think of.
This past weekend we went camping. Indoors. On our living room floor. We pitched our tent, brought out the sleeping bags and told stories by flashlight. All while watching the snow pour down outside. My kind of camping. Warm camping. The thing that was missing though, was the camp fire. And no campfire means no s’mores. Or so you thought.
I don’t know where I saw this recipe, I wish I did. I am not even sure that I am in fact doing it right. I sort of made it up as we went along based on what I thought it should be. And I thought it would be delicious!
First I preheated our fire (oven) to 450 degrees.
Next I grabbed my smallest cast iron skillet and filled the bottom with chocolate chips. I didn’t really measure it, just dumped them in until the bottom was well covered. You can’t have too much chocolate right? Then I dumped a bag of mini marshmallows on top of the chocolate.
Put the skillet into the oven for about 6 minutes. If your marshmallows aren’t browning turn on the broil for a minute. Watch them closely, they can and will burn quickly. When your marshmallows have reached your desired brownness take the skillet out of the oven.
Finally, it’s time to eat! Grab some graham crackers and use them like a spoon to get the gooey chocolatey marshmallow goodness into your mouth. It’s almost like the real thing, maybe even better.
Nutella Brownies
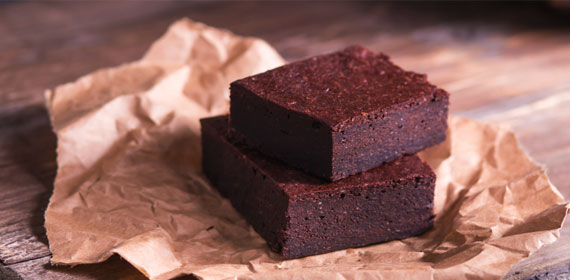
I might be the very last person to get obsessed with Nutella, but it has officially happened. I swore t never try it, simply because of how crazy people were about it. But, alas, someone bought me a small jar and now I am just like everyone else in my Nutella obsession. I have been spreading it on toast, baking it into cookies, swirling it into pancakes and you name it.My latest creation was a brownie. You read that right, a Nutella brownie. Not a swirled brownie. Instead a straight up Nutella brownie. Stop licking the computer screen. Here is what you need.
1 cup of Nutella
2/3 cups flour
2 room temperature eggs
Pinch of saltMix everything together until it comes into a batter texture. Try your best to not eat the entire bowl. I know it will be hard. I do.
Pour it into a lightly greased brownie sized baking pan. (I used an 8×8 pan).Bake at 325 for about 30 minutes or until the brownies are set.
For an extra dose of yum, before baking, add dollops of your favorite peanut butter on top of the batter. The peanut butter will melt during cooking and swirl in. We all know that chocolate and peanut butter is amazing.
If you would rather try to go a bit healthier, use whole wheat flour and mix in a few tablespoons of flax meal. Sprinkle with unsalted peanuts for a nice crunch.
Nutella Truffles
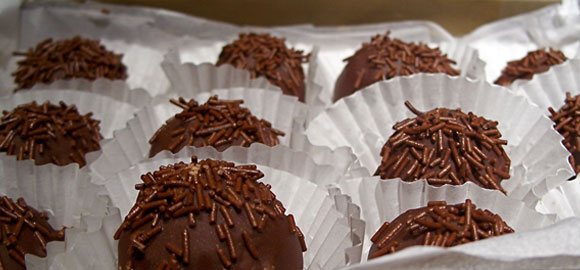
Now that the holidays are over its time to share all the wonderful things that I learned. Because gathering recipes from others is awesome. For example, I learned that there is such a thing as Nutella truffles. My sister in law brought them to our Christmas gathering, and they made my head spin. I hate to admit that I had way more than one. Way more than five over the course of the evening. It was addicting and got out of hand. Of course, I had to inquire as to how to make these fiendishly good treats. Even though the holidays have passed, these would make an excellent Valentines Day goody. Or just any occasion you need chocolate, specifically a Nutella goody.This was the run down she gave me.
You need:
3 cups rice cereal
5 oz marshmallows
2 tablespoons unsalted butter
1/2 cup Nutella
Splash of vanilla
Candy melts, dark or milk chocolate (I preferred the dark)Your first step is to not eat all of the Nutella out of the jar with a spoon.
In a small saucepan over medium low heat melt your butter, marshmallows, Nutella, and vanilla. Stir the mixture frequently until completely melted and combined.
Place your rice cereal into a large bowl. Pour the Nutella mixture over the cereal and mix thoroughly.
Portion this gloriousness into tablespoon sized chunks then roll in your hands to make round balls. I used a number 60 cookie scoop because uniformity is my friend. Place the balls on parchment when finished.
Next its time to dip them into chocolate. My sister in law said she used regular chocolate chips. However, my experience tells me that using candy melts will be faster, and easier. If you use chips, your coating will likely be thick. With such a rich center I thought that a thinner coating might be more appealing. The melts are made for coating things, they just work easier. Plus they are not as fickle.
Whatever you choose the process is mostly the same. Melt the chocolate and one at a time, dip the cereal/Nutella balls into it. I used a fork for dipping, I feel like it allows more chocolate excess to drip off. Once it has been submerged and allowed to drip a bit, place it on the wax paper to allow for the chocolate to set.
If you are uber fancy, you can sprinkle some sea salt on the top of each truffle. My sister in law suggested drizzling milk chocolate, or just melted Nutella. Any way you choose, these are delicious and sure to be a hit!
Oatmeal Cookie Pancakes

As a parent, I am always looking for more things I can prepare for my kids to eat for breakfast. It is so easy to get into the cereal rut, or even the pancake rut, and I just don’t like ruts much. Therefore, I search and search the internet for breakfast ideas. Preferably ones that are healthy and not completely full of sugar. Sometimes, I even just get into the kitchen and experiment myself. At times this is successful, and others not so much.
This recipe came recommended to me by a friend who shares my healthy breakfast ambitions, and I have to admit it is good enough to work into my routine. To me, these pancakes taste just like oatmeal cookies. Boy do I love oatmeal cookies. It is a win, win. These are not overly sweet, even though they taste like cookies. I’m not sure how or why, but I’m going to roll with it and enjoy the mystery. What is important, is that my kids and my husband all love these. They are good for you, and very filling.Ingredients:
1 cup milk
2/3 cups of oats (I have used steel cut, rolled oats, and quick oats all with similar success. Use what you have)
2/3 cup whole wheat flour
2 tablespoons dark brown sugar (you can decrease this some if you use very sweet toppings. Or if you stir in a few chocolate chips into each one while cooking. Chocolate chip oatmeal pancakes!)
1 1/2 teaspoons baking powder
1/2 teaspoon cinnamon
1/2 teaspoon salt
2 eggs, beaten
2 teaspoons vegetable oil
1/4 teaspoon vanillaIn a microwave bowl pour your milk. Microwave about one minute, or until hot but not boiling. If yours start to boil, let them sit for a few minutes. Stir in your oats. Cover and let stand for about five minutes. Which is about how long it takes to do the next steps.
Mix your flour, sugar, baking powder, salt, and cinnamon in a large mixing bowl. Make a well in the center to pour your wet ingredients.
In a separate bowl, mix your eggs, vanilla, and oil. Pour them into your well that you made in the flour mixture. At this point, your oats will look kind of gross, and will not have absorbed all of the milk. Don’t worry, this is what you need! Pour them on top of the other liquid ingredients.
Mix.
I like to let my batter stand for about five minutes to rest, but it is absolutely not necessary. Get your griddle hot. Spray with cooking spray and ladle your pancakes onto it and cook like you would cook any pancake. I generally measure my pancakes by 1/4 cup. They seem to make just the right size for me and my kids. Using a 1/4 cup you will get about 8 pancakes total.
One Pot Cooking for Fall and Winter
 Cooler days are here and there is a wonderful coziness acquired from eating a nice warm stew/soup at the dinner table with family. But who has time to cook like that daily!?!? Welcome the crockpot. Do it all in the morning, done by night. Or even prepare everything in the morning when making kids lunches, toss it into a stew pot and an hour or so before dinner, put it on the stovetop. Here is a basic formula I use and 3 out of 4 times, it turns out delicious. The 4th time, well, we eat it anyway.
- * Put in the mirepoix (onion , carrot, celery, aka my Three Amigos).
- * Put in the protein (ex. chicken, stew meat, turkey, beans)
- * Put in a vegetable or two (ex. Squash, tomato, kale)
- * Add some spices, garlic, salt and pepper, a little bit of water and optional tomato paste. Put the lid on it.
Here is an example of a stew I made recently that was wicked delicious. Mirepoix, chicken thighs, green beans, butternut squash, tomato paste, water and spices.
Some extra/optional tips:
- * Add cut up apples, prunes or apricots to layer in a subtle sweetness.
- * Add a hint of chili pepper to “kick it up” a drop. Mine like it a little spicy and peppers are loaded with vitamin C.
- * Test it out on your family to see which ingredients work well and turn that dish into a stew.
Orange Breakfast Bread
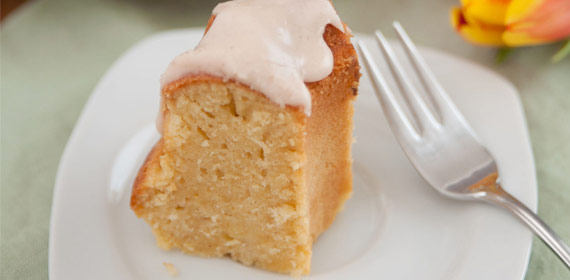
We love a good sweet bread here. They make a great alternative to cereal for a quick breakfast. We love banana bread, maple bread, blueberry bread, just about all of them!
This is our newest favorite, with oranges being in season right now.Orange bread, like many in this category, can be made as a loaf or as muffins. I prefer to just make a loaf these days but only because greasing the muffin tins makes me crazy. I know, I could just as easily used muffin tin liners, but I didn’t have any.
Anyway, on to the goodness of the actual recipe. This is a groat one for little chefs to try out because it is basically kid proof.
Start by preheating your oven to 350 degrees.
In the bowl of your stand mixer, cream butter and sugar until it becomes light, fluffy and pale. Turn down your mixer speed and add your eggs one at a time. Pour in your yogurt and allow the mixer to run for a few minutes to fully incorporate.
With the mixer on low add your orange juice and orange zest.
Add flour, baking powder, baking soda and salt slowly to the butter mixture. Mix until thoroughly combined.
Pour your batter into a prepared loaf pan. I tend to use two small loaf pans instead of one large one. This way I can freeze one loaf for another day.
Cover your pans loosely with foil and bake for approximately 50-60 minutes, or until a toothpick comes out clean.
Cool for at least an hour before glazing.
To make your glaze, mix sugar and orange juice one table spoon at a time until you get a glaze consistency. Once you get it the way you like, add the orange zest. You can also use orange oil instead of the zest if you don’t like the look of the little orange flecks. I love them, so that’s what I use.
Place paper towels under your cooling rack, and then drizzle the glaze over the bread.
Ingredients:
Bread-
2/3 cup unsalted butter
1 1/4 cup sugar
2 eggs room temperature
1/2 cup orange juice (freshly squeezed if possible)
Zest from one orange
1/2 cup vanilla yogurt
2 1/2 cups flour
1/2 teaspoon baking powder
1/2 teaspoon baking soda
1 teaspoon saltGlaze-
1/2 cup powdered sugar
3 tablespoons of orange juice
Zest of orangePasta and Peas
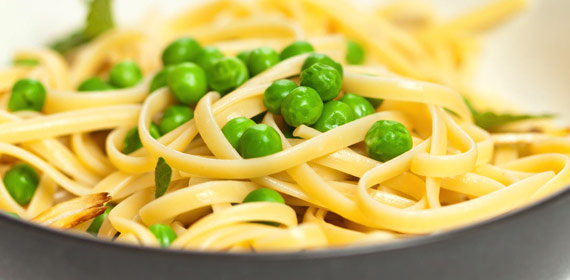
Over the course of the last few years I have lost quite a bit of weight. People often ask me what I ate while going through that process. Most everyone is surprised to hear that I didn’t do a crazy restrictive diet. I ate carbs, sugar, fat, basically whatever my body was craving. I knew that if I tried to cut anything out I would not be able to stick with it for the rest of my life. That being said, one of my favorite dishes was a simple dish of pasta and peas.My kids also enjoy this dish. The recipe I’m listing is just for a single serving, but it is easy to double or triple as needed.
Per each person you are making this for you will need:
2 ounces of whole wheat pasta
2 teaspoons olive oil
3 cloves garlic sliced thin, or finely minced
1/2 cup frozen peas
1 tablespoon grated Parmesan cheeseCook your pasta according to the package directions. I like to use a curly pasta here, but I often just use whatever I have on hand, so feel free to use what you like.
While you are waiting on your pasta to boil heat your oil over medium low heat. It’s not much oil so it won’t take much time to heat it.
Sauté the garlic in the oil, then add the peas and cook until warm.
Drain your pasta and add it to the pan with the peas, garlic, and oil. Stir to combine.
Dish up the pasta and immediately sprinkle with the cheese.
I love this simple meal for lunch, but it can easily be adapted to dinner. Just serve with a grilled chicken breast and you have a great balanced meal that both you and your kids will love.
Peach Fro-Yo
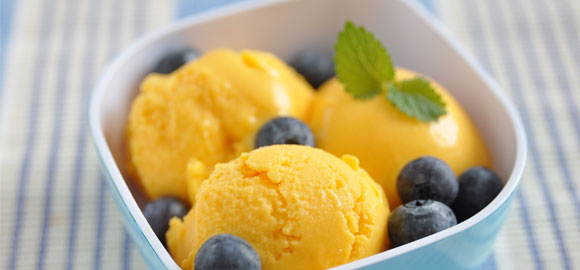
Today it is snowing. It’s snowing a lot. We are all bundled in the house enjoying warm cocoa and marshmallows. Ironically this weather makes me miss summer so much more. The flavors of the ripe fruits, the smell of the air, and the feel of those warm breezes against my bare feet. Yeah, it’s heaven. So even though it is completely out of season I’m making peach frozen yogurt for desert tonight. It is never too cold for fro-yo afterall.It’s such an easy recipe and perfect for summer, or those bitter cold winter nights when you are wishing it was still summer.
You will need:
1 bag of frozen peaches, approximately 16 ounces worth
3 tablespoons honey
1/2 cup low fat vanilla yogurt
1 tablespoon lemon juiceIf you prefer tart frozen yogurt, use plain yogurt instead. I prefer the slightly sweet variety and so does the rest of my family so we use the vanilla flavored yogurt. You can also add or subtract to the amount of honey used as sweetener. Additionally, I have skipped the honey and used sugar before, but I love the hint of honey.
Purée all of the ingredients in your food processor. After a few minutes it will resemble soft serve. Taste it to check for your desired sweetness level. Always start with less, it is much easier to add sweetener than it is to take it out! When it tastes to your liking, serve it up!
If you like a more ice cream texture, place your yogurt into an air tight container and harden for a few hours.
I love serving this with a sprig of mint, or sliced fresh peaches garnished on top. Another fun thing to try is to sprinkle in some ginger before you purée to add a touch of complexity. Or you could splash in some extra vanilla for that peaches and cream flavor.
Peanut Butter and Jelly Quesadillas
 If you have ever lived in the south you know that it rarely snows. When the weather channel predicts even the smallest dusting of snow, it seems that everyone and their brother heads to the store to buy bread and milk in order to survive the impending doom. So when I discovered that we were out of bread, and that the weather was predicting two inches of snow, I knew better than to even attempt to purchase bread. We had to get a little creative with our lunch sandwiches.
Instead of traditional peanut butter and jelly sandwiches we made up some peanut butter and jelly quesadillas.
My thought process was simple. Tortillas are like bread. I have no bread. I have tortillas. Melted peanut butter is scrumptious. It was that easy.
The assembly was also simple. First I spread some peanut butter onto the tortillas. Next I added small amounts of strawberry jelly.
Because I was feeling saucy, I added small slices of bananas, and a few chocolate chips. Fold the quesadillas in half and cook just like you would any other quesadilla.
My kids thought these were so tasty that they continue to ask for them. We have even whipped them up for breakfast a few times. And I will tell you, any time my kids eat, and enjoy it this much it is a godsend.
Peanut Butter Hot Chocolate
 Baby, it’s cold outside.
For me, that means cozy pajamas, blankets, movies, and snuggling with my husband and kids while watching a movie or two. Oh, and don’t forget the slippers! What better way to warm you up on a cold evening than a steaming mug of hot cocoa, right? Darn right. It is the drink straight out of heaven. Now, if you know me, you know that I am obsessed with the combination of peanut butter and chocolate. All is right in the world when those two things get together and mingle. So when I saw the recipe for Peanut Butter Hot Chocolate on The Cooking Actress blog. I knew that this was the new go to drink for my cold evenings.
Now, if you know me, you know that I am obsessed with the combination of peanut butter and chocolate
Her recipe only serves one. And lets face it, one serving size, on those ‘Nutritional Information’ charts you find listed on packaged food items might sound great on paper, just doesn’t cut it for me. Especially chocolate and even more so chocolate with peanut butter. So, I adapted the recipe (in case I decide to share), to serve my family (about four servings).
Whisk together four cups of milk, four tablespoons of cocoa powder, six tablespoons of white sugar, and one and a half tablespoons of vanilla extract together in a pot. Turn the heat to medium high and bring the mixture to a soft simmer.
Mix in four tablespoons of smooth peanut butter into the mixture. Watch the peanut butter melt into the chocolaty goodness.
When the peanut butter has finished melting into the hot chocolate scoop it into four mugs.We top ours with marshmallows (on principle. Hot chocolate gets marshmallows) and peanut butter chips. I am sure that regular chocolate chips would also be Divine, but I am a sucker for peanut butter.
The only way to describe how good this is, is to call it decadent. With most of those ingredients already sitting in your pantry, it might be too easy to whip up. Try not to indulge too often!
Peanut Butter Popcorn
-
Popcorn in all it’s salty goodness is a staple around here. If I could, I would eat eat it every single day. I am not a huge fan of the microwave variety, but I prefer to pop my own on the stove top. If you’ve never done it, I suggest you stop what you’re doing right now and get to it. It is super easy, and unbelievably good. Grab a big heavy pot with a lid, add in one quarter cup of vegetable oil and one half of a cup of popcorn kernels. Turn on your stove,put the lid on the pot, and get your hot pad holders on. While its cooking you need to gently shake the pot back and forth over the heat. After a few minutes you will be rewarded with fluffy pop corn. Add a tablespoon of melted butter and a pinch of salt and you have a killer snack. If you’re like me though, you might want to spice things up a bit every now and again. Caramel corn, honey corn, and kettle corn are some of my favorites. I even enjoy mixing in some chocolate chips for some sweetness. But, sometimes nothing in the world is better than peanut butter. And peanut butter popcorn is fantastic. Sweet, salty, creamy, crunchy. Yum.
Pop yourself some popcorn. You will want 5-6 cups of popped popcorn. Do your best to filter out any kernels.
In a nonstick pan, cook over low heat 1/2 cup of butter with 3/4 cup of brown sugar, a pinch of salt, and 20 large marshmallows. Cook until it all blends together into sugary goodness. Mix in 1/2 cup of peanut butter. I like to use crunchy for the added texture. I Stir until well mixed. Pour the peanut butter mixture on top of your pop corn and quickly stick to coat it all. Let it cool, then devour it. Or eat it slowly, and savor it. Either way this is one that you will come back to again, and again. Peanut Butter Stuffed Chocolate Cookies
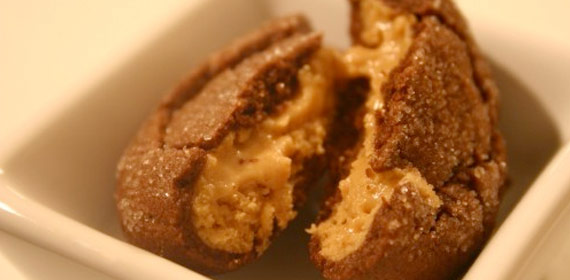
I know the last thing we all need is another cookie recipe. Actually, I am always in the mood for a new cookie recipe. Always! My kids had been running a bake sale to earn spending money for our Disney vacation, and we were all a little tired of chocolate chip cookies. I tell you, that’s saying something for this cookie loving gal. So we began perusing my cookbooks and browsing our pantry. That’s when I spied the peanut butter and the cocoa powder. My mind immediately went to Reese’s peanut butter cups. I thought out loud to my kids, we must make a peanut butter cup cookie. They assumed I meant that we would use small peanut butter cups in lieu of chocolate chips or something in a cookie. But no. I planned to make a cookie that was a peanut butter cup.That is how these cookies were born.
To make the cookies:
1/2 cup butter
1 1/4 cup sugar
1 egg
1 tablespoon vanilla
1 1/2 cup all purpose flour
1/3 cup plus 2 tablespoons Dutch process cocoa powder
1 teaspoon salt
1 teaspoon baking powderCream the first four ingredients in your stand mixer with your paddle attachment. Sift the flour, cocoa, baking powder, and salt together in another bowl. Slowly sift the flour mixture into the wet mixture. Mix until a dough forms.
Use a cookie scoop to portion out 32 balls of dough. Use the palm of your hand to flatten each ball. Set aside.
Make the filling:
3/4 cup peanut butter (I used creamy, but I imagine that chunky would also be amazing)
2/3 cup confectioners sugar
3 tablespoons milk
1 teaspoon vanillaBlend all ingredients until smooth.
Using the same cookie scoop that you used to portion the cookies, scoop the peanut butter mixture and place on 16 of the cookie rounds. Top those with the remaining cookies. Gently press the sides together. Don’t be afraid if the top cookie cracks a little. It will still taste and look scrumptious! Also, don’t worry if some of the peanut butter mixture is seeping out the sides. All will be okay.
Bake these bad boys at 350 degrees for 11 minutes. Allow them to cool on your cookie sheet for about 3-5 minutes before removing. Enjoy warm, with a huge glass of milk!
Potato Bacon Soup

It is soup season! I adore soup season. I love how you can put a pot on to let it simmer and the whole house feels warmer and smells amazing. I love that soups are wonderfully filling, and you can pack in some good veggies too. One of my all time favorite soups would have to be Potato Bacon Soup. It has potatoes, yum! It has cheese, yum yum! And it has bacon!! Yummy!! Thick and creamy, tastes like a caloric nightmare. Thank goodness, it’s really not that bad. It just tastes that good. I have a pot of this on right now, and I just wish I could share the scent.You will need:
2 1/2 pounds potatoes
4 slices of bacon
1 chopped onion
1/2 teaspoon salt
2 cloves garlic
1 bay leaf
3 3/4 cup 2% milk
Pepper to taste
2 cups chicken broth
1 cup sharp cheddar cheese
Green onions for garnishHeat your oven to 400 degrees. Wash and dry your potatoes, then pierce them with a fork. Wrap in foil and bake them for one hour. Remove from the oven and allow to cool until you can handle them. In a large bowl roughly mash your potatoes skin and all. Set aside.
Prepare your bacon until extra crispy. Remove the bacon from the pan, leaving the drippings. Cook the onion in the bacon drippings. Sauté until the onions are transparent. Add the potatoes and seasonings to the pot with the onions. Slowly add the milk and broth. Stir while bringing to a boil.
Reduce your heat to a low simmer for roughly 10 minutes. Mix in the cheese and stir until melted.
Serve immediately and top with crumbled bacon, green onions, and extra cheese.Feel your insides warm up with the first bite.
Potato Kugel
Ingredients: Serves about 8
6 Potatoes Peeled
2 Zucchinis
4 Carrots Peeled
1 Onion (white)
3-4 Eggs
½ Cup all-purpose flour
⅓ Cup of oil (Canola or Vegetable)
¼ Teaspoon Black Pepper
¼ Teaspoon salt
1 Tablespoon of Baking Powder
Preparation
- Preheat oven to 400°F.
- Use cooking spray or butter to lightly coat the bottom and sides of a baking dish, which should be at least 2-inch deep and 9 X 12-inches wide. We prepare both steps one and two prior to peeling and working with our products to reduce browning of our vegetables.
- Peel the carrots, potatoes, zucchinis, and onions. Then shred them either manually or with a food processor into a large bowl.
- Add the rest of your ingredients and mix with a large spoon to an even consistency.
Pour the contents into the baking dish and bake for approximately 45-60 minutes, depending on your oven, until it is golden brown. For a firmer consistency, allow the Kugel to cool for 20 minutes before eating.
Royal Icing
 Every year for each and every holiday I make decorated sugar cookies. I make them for Christmas, I make them for Valentines Day and even birthdays. My kids even give them to their teachers for end of year gifts. They are super easy to make, but for some reason they come across as elegant and special. The reason is just the use of royal icing. The trick to royal icing is ensuring the proper consistency, and proper flavoring.
When I make my cookies I make sure that I bake them at least one day before I decorate them. You want them slightly dried out. That way the moisture in the cookies doesn’t interfere with your awesome decorations.
On to the icing. Mine is basic, and a variation of the Wilton recipe you will find online.
You will need:
1 2 pound bag of powdered sugar
1/3 cup plus 1 tablespoon of meringue powder
3/4 cup warm water
2-4 tablespoons extract (make sure it’s oil free extract) I often use almond, vanilla, or orange extract.Throw all of it into your stand mixer and mix until stiff peaks form. It will take close to ten minutes before it is ready.
Now that your frosting is ready you can divide it and color it as you choose. For most of my cookies I keep it to one or two colors. I find that the more simple my design the better. At least for me.
When your frosting is tinted to your liking its time to thin it out. Add warm water one drip at a time until you get to the consistency of thick pancake batter. This is what we call piping consistency. Fill your piping bag and outline your cookies. (I use a number 2 tip). After you have piped about three cookies you will want to “flood” your cookies with more icing. To make flood icing you need to thin it out some more, one drop of water at a time. You know you’ve got the right texture when it resembles a thin gravy. You can put your flood icing into another bag or just spoon it on the cookie. Use the back of the spoon to carefully spread the icing. You don’t have to completely spread it, the flood icing is thin enough that it will spread a bit if allowed to sit for a few minutes.
Once you finish all your cookies this way you need to let them sit for a few hours. After that you can build on your base layer and get as complicated as you wish. For me, I usually just grab that piping icing I had left over and allow the kids to pipe on some swirls. It’s elegant and so easy. Plus the kids will always volunteer to help you lick the utensils clean!
S’mores Granola Bars
I probably have about ten different granola bar recipes. I truly love the things. They can be pretty good for you, they taste super delicious, and they are easy to whip up. I love making my own granola bars because I can sneak in healthy things. Flax seeds, wheat germ, chia seeds, protein powders, you name it. You can also throw in nuts, seeds, and fruit.This granola bar recipe however, is more on the indulgent side. It is my son’s favorite; the s’more granola bar.
Most of my granola bars start with this base:
1/2 cup butter
1/2 cup dark brown sugar
1/4 cup local honey
Pinch of salt2 cups granola
1 cup cereal
Mini marshmallows
Mini semi sweet chocolate chipsMix these ingredients in a large non stick pot. Over medium heat melt the butter. Stir frequently as the butter melts and mixes with the sugar and honey. Once the mixture boils, stop stirring and let it boil for about two minutes. Turn the heat off and add 2 cups of plain granola and 1 cup of cereal.
For s’more granola bars I opt to use Honey Graham cereal. It should be noted though, that you can also use graham crackers that you crunch up as well. Either way its delicious, but the cereal remains more crunchy. Which I like.
Stir the cereal and granola into your sugar mixture and quickly pour into a parchment paper lined 9 by 9 pan. Working quickly spread the mixture as evenly as possible in the pan. Next, sprinkle your marshmallows and chocolate chips on top. Grab another piece of parchment paper and place it on top of your pan. Use your hands to press the mixture flat into the pan. This will also help to distribute the marshmallows and chocolate chips.
When you have it as pressed as you can make it, cover the dish and place it in the fridge to cool. It needs at least a few hours, but overnight is best.
When cool, slice into bars or squares. Heck you can even do triangles if you please. Granola triangles taste better than granola bars. At least that’s what I hear.
Wrap individual bars with parchment paper and store refrigerated in an air tight container.
Sandbox Pudding

I had the pleasure of attending a fun beach themed baby shower last weekend. Mom and dad had designed. Hawaiian and surfing themed nursery for the soon to be born son and extended the theme to their shower. In addition to being a fun shower, complete with leis, Hawaiian shirts, and barbecued food, they served us what was called sandbox pudding. Each of us got a small little beach pail. It held maybe a cup or so, and a mini shovel. I’m glad I had a shovel, because this stuff was surprisingly good and I enjoyed shoveling it into my face.Sandbox pudding is essentially supped up pudding layered with what looks exactly like sand, made from finely crumbled cookies. It was so delicious I had to get the recipe to share with the world. I had never heard of sandbox pudding, so I feel as if I can safely assume many of you haven’t either.
Here is what you need to make your own:
Sand-
1 box of vanilla wafer cookies
3 chocolate sandwich cookiesPudding-
2 packages vanilla pudding
1 brick softened cream cheese
1/2 stick butter, softened
2/3 cup powdered sugar
2 3/4 cup milk
12 oz whipped topping thawedFirst make your pudding by combining the pudding with the milk. In a separate bowl cream the butter, sugar, and cream cheese. Once it is smooth, blend in the pudding mixture. Finally fold in your whipped topping.
To make your sand, add the entire box of vanilla wafer cookies into the bowl of your food processor. Pulse to begin crumbling. Add the chocolate sandwich cookies one at a time. Continue to pulse until the cookies are the texture of sand. The three chocolate sandwich cookies make the sand look more realistic. You can add less or more depending on how you like your sand to look.
To serve, add a generous dollop of pudding into your bowl, or bucket if you’re super cool like that. Smooth and flatten it a bit with your spoon. Next add a good portion of ‘sand’ on top.
I imagine this would be fantastic for themed birthday parties, or play dates. I know my kids love this just as much as they love the good old fashioned cup of dirt!
Snicker Doodles
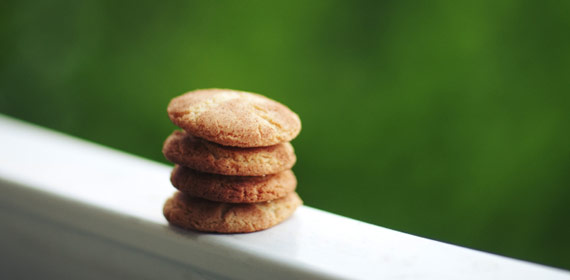
I truly love baking. It is a love that I have thankfully passed on to my kids. In my house, we have a saying, “Where there are cookies, there is hope. And there are always cookies.” Okay, so that was slightly modified from a Dean Koontz book that I read years ago. In his version there is always cake. But here, for my family, it is cookies. There are always cookies.Recently we decided to try and make a great snicker doodle recipe. I am picky about my snicker doodles. I want them to be soft on the inside, and crisp on the outside (like many a good cookie should be). Most of the recipes that I found were hard, and crunchy. No good! And that is how we came to make our own snicker doodle cookies.
Here is how it goes
1 1/2 cups granulated sugar
1 cup butter
2 eggs
2 3/4 cup all purpose flour
3 teaspoons baking powder
1/2 teaspoon salt1/4 cup granulated sugar
3 teaspoons cinnamon powderHeat oven to 400 degrees
Cream the butter and the sugar until light and fluffy. Add the eggs one at a time, mixing between each one. Stir in flour, baking powder, and salt.In a separate bowl, mix the remaining sugar and cinnamon.
Scoop the dough (using a cookie scoop if you have one) into balls. Roll each dough ball in the cinnamon and sugar mixture. This is of course the part my kids like best. They love coating the dough in cinnamon sugar. When you have finished coating all of the cookies bake them in the preheated oven for 7-8 minutes. Remove them from the pan immediately and allow to cool.
Because the entire ball of dough was coated in sugar, the bottoms of the cookies get this perfect little crunch to them. The insides remain soft and chewy. Every bite is fantastic cinnamon-y goodness.
Soft Sugar Cookies That Hold Their Shape
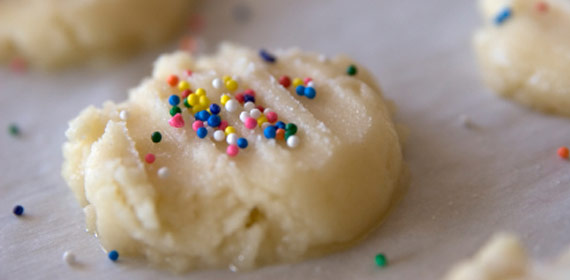 I love cookies. And I might be a tad unusual in that I do not discriminate about what type of cookie I eat. If it’s a cookie, I am happy to eat it. But I am especially partial to a good soft sugar cookie. One that holds its shape really well when being rolled out using a cookie cutter. One that is delicately frosted with a killer frosting. Can you envision what I am getting at? The perfect cookie! Over the years I have tried so many cookie recipes trying to create the “perfect cookie.” I will tell you that this was no easy task! My waist line has particularly suffered. But alas, I have been victorious. And I am here to share my bounty with you.
Perfect soft sugar cookies:
3 sticks of unsalted butter
1/2 cup powdered sugar
1 1/2 cups granulated sugar
2 teaspoons vanilla
Zest from one lemon
5-6 cups of flour
1 1/2 teaspoon salt
2 teaspoons baking powderPreheat your oven to 400 degrees
Cream your butter and sugars together until light and fluffy. A minimum of four to five minutes. Add the eggs one at a time taking the time to ensure that they are each well incorporated before adding the next. Mix in the vanilla and lemon zest. Add the flour one cup at a time, again making sure it is well mixed in before adding the next. After five cups of flour add salt and baking powder. If your dough is still very sticky add remaining flour until the dough is smooth.
You can chill this dough, as you would traditional sugar cookies, but let us be honest. I don’t have time for that. I just go ahead and start rolling right away.
I like my sugar cookies to be a bit on the thicker side, so I roll them pretty thick. Somewhere between 1/4 of and inch and 1/2 of an inch. Use your cookie cutter of choice and then bake for 7 minutes and 30 seconds. You want the cookies to come out evenly cookies, without browning on the bottom.Personally I could eat these just as they are, without any frosting. But seriously they are extra special when you add your favorite frosting. Enjoy them at your own risk!
Sour Cream Cake Mix Sugar Cookies

I know that I cannot be alone in my love for Lofthouse sugar cookies. You know the ones I am talking about, the super soft, cakey, moist, thickly frosted cookies. Oh my goodness they are so good. I am slightly ashamed to admit that I could eat those things by the handfuls. I don’t because that would be bad. Very bad. Mostly for my thighs. So when I found a recipe that claimed to be better than my arch nemesis cookie, you know I couldn’t resist. I did cartwheels in an attempt to counter balance the calories I was sure to partake.Ingredients:
1 box of white cake mix with pudding
2/3 cup of all purpose flour
2 large, room temperature eggs
1/3 cup vegetable oil
2 tablespoons sour cream
1 tablespoon vanillaPreheat your oven to 350 degrees.
In the bowl of your stand mixer (you could do this by hand, or with regular beaters, but why?) mix the four and cake mix.
Add your eggs, one at a time until completely blended. Add the remaining ingredients and mix on medium speed until everything is well incorporated and a dough has formed.Using a cookie scoop (I used a #60) to portion your dough. Place on a cookie sheet about two inches apart. Gently flatten the cookies just a tad before baking. Bake for about ten minutes. You want to remove the cookies when they just set, if the bottoms of your cookies are brown, bake a minute less next time. Allow them to sit on the cookie sheet for two minutes before removing to cool completely.
Frost these bad boys with your favorite butter cream frosting (or use store bought if you are so inclined, but home made is infinitely better in this application.) Frost and then decorate with a few sprinkles and you are done!
Squash Pie
Ingredients: Serves about 8
1 Deep Dish Pie Shell (9-inches)
12 Ounces of Squash (fresh or frozen pack)
½ Stick of Melted Butter (or applesauce)
3 Eggs
½ Cup all-purpose flour
½ Cup of Sugar
1¼ Cup of Coffee Rich (or water)
1 Teaspoon Cinnamon
Preparation
- Preheat oven to 350°F.
- Boil and peel 12 OZ of Squash or just buy the frozen package. Mix all of the above ingredients in a large bowl to an even consistency.
- Pour the contents into the pie shell and bake for approximately 70-80 minutes, depending on your oven, until it is a light brown. For a firmer consistency, allow the Pie to cool for 20 minutes before eating.
Squash Soup
1 large butternut squash
1 large sweet potato
2 stalks celery
3 carrots
1 cup shredded cabbage
2 medium zucchini
2 cups water
1 tsp. marjoram
½ tsp. cumin
½ tsp. salt
1. Peel, seed and dice squash. Then peel and dice sweet potato, celery, carrots and zucchini. Place them all in a 4-quart pot.
2. Add water and seasonings. Then bring it to a boil and simmer until vegetables are tender (approx. 1-hour).
3. Puree in food processor.
4. Return to pot with remaining broth, reheat, and serve.
Sweet and Spicy Pecans
1 c. granulated sugar
1 tsp salt
1/2 tsp ground cumin
1/2 tsp cinnamon
1/2 tsp ground red pepper
1/2 tsp chili powder
1/4 tsp ground ginger
2 c. pecan halves
1 large egg white
- Preheat oven to 350 degrees.
- Grease a large cookie sheet.
- In a medium bowl whisk sugar, salt, cumin, cinnamon, red pepper, chili powder and ginger.
- In a second medium bowl toss small batches of pecans in egg white to moisten. Shake off extra egg white.
- With dry hands coat small batches of pecans with sugar mixture. Shake off excess sugar and transfer to greased cookie sheet.
- Repeat steps 4 and 5 until all of the pecans are coated and on greased sheet in a single layer.
- Bake at 350 degrees for 30 minutes, until sugar mixture is golden brown.
- Loosen pecans with spatula and let cool completely.
Pecans will keep for up to four weeks in an airtight container.
Toasted Pumpkin Seeds
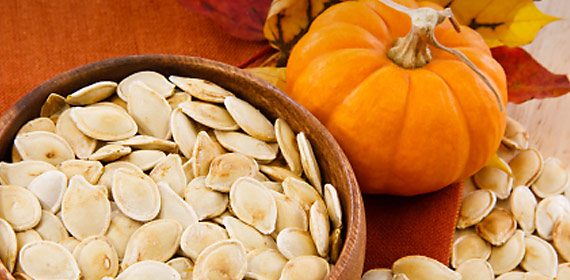
Fall is an amazing time of year for me, and my family. One of our favorite things about fall is the food. Pumpkin everything! I’m fairly certain that there isn’t much that has pumpkin in it that I do not enjoy eating. Right up there on my list of favorites are roasted pumpkin seeds. I eat them plain, by the handful, on salads, even baked into some homemade granola or granola bars. And of course, they are the type of food that you can prepare with your kids. Start by opening a pumpkin just like you would if you were to carve it. Reach in and remove all of the seeds from inside of your pumpkin. This is the part that my kids love to do. When you have removed all your seeds, clean them thoroughly making sure to remove any stringy pulp that may still be attached to your seeds. Pat them dry with a paper towel.
You want them to be crispy and crunchy. Almost like a sunflower seed.
The next step is actually toasting the seeds. You can do this one of two ways, first in the oven. Spray your seeds with non stick spray. Lay them in a single layer on a baking sheet. Cook at 325 for about 20-25 minutes. Stir every 10 minutes. Check readiness by tasting. You want them to be crispy and crunchy. Almost like a sunflower seed.
Your other toasting option is in a heavy bottomed pan, like a cast iron skillet.
Turn the heat to medium, once the pan is hot pour in your pumpkin seeds. Stir them continuously so that they do not stick or burn. You will know they are finished when they start to peel or split-open a little. Again, check for readiness by tasting.
At this point, it is time to think about flavorings. I usually go for a sweet and salty combo, but whatever you like is fine, including just regular old salt.
To make my sweet and salty ones you need brown sugar, olive oil, and salt. Easy! Remove your seeds from the oven or pan, and toss with a teaspoon or two of olive oil. Just enough to coat them. Then sprinkle them with the brown sugar and salt. Return to the heat (or oven) and cook just until the sugar melts. Keep your eyes on them, sugar can burn fast!
Now just allow them to cool, and enjoy!
For other fun flavors, consider a flavored olive oil. Garlic olive oil and some salt, lemon olive oil and salt.
Yummy!
Tomato Basil Soup
3 c. canned peeled plum tomatoes
3/4 lbs carrots, peeled and chopped
3/4 lbs onions, chopped
1 tbsp dried basil
1/4 c. olive oil
8 c chicken or vegetable stock
3 c. heavy cream
1 tbsp kosher salt
1 tbsp black pepper
1/2 c. fresh basil leaves
Freshly grated Parmesan cheese
- In a large pot, heat the olive oil.
- Sautee the carrots and onions at medium heat for 15 minutes.
- Add the dried basil, salt, pepper and tomatoes. Bring to a simmer.
- Add the chicken/veggie stock to the pot and bring to a boil.
- Simmer for 45 minutes.
- Puree the soup using a hand blender while adding the heavy cream until it has a smooth, thin consistency.
- Once in individual bowls sprinkle with fresh Parmesan, add a fresh basil leaf, and serve.
Traditional New Years Pie
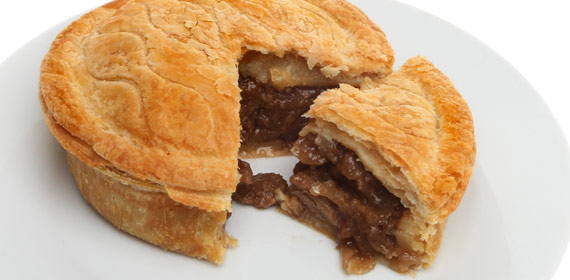
Growing up I have fond memories of my grandmother making a special pie each year. Either for Christmas or for New Years. I remember the smell of her kitchen, and the anticipation of yummy food to follow. It was a family tradition. Now that I have kids of my own, I want to continue the tradition with them too. This pie is called Tourtière. It originates from the Quebec region of Canada.It is not a sweet pie, but instead a savory pie. And it is delicious! The pie crust is flaky and tender, extremely light, and it’s filled with good meaty bliss. Okay, enough with descriptions here as I’m making myself hungry. Now let’s get down to business.
To make tourtière you need pie crust. I imagine you could use any pie crust recipe you wanted to, but I love it best with this recipe from my great, great, grandmother.
4 cups flour
2 teaspoons salt
1 3/4 cup shortening
1 large egg
1 tablespoon vinegar
1/2 cup ice waterThis makes four nine-inch pie crusts, or two twelve-inch pie crusts, depending on the size of your pan.
Mix together your flour and salt in a large mixing bowl. Put in your shortening using two forks or a pastry fork. Keep cutting until the shortening is pea sized. Stir in your vinegar, egg, and water. Continue to mix until a dough ball forms.
Divide your dough in half, then in half again. Place two of your dough balls into a plastic bag and freeze for another pie.
Your remaining two dough balls can be rolled out for this pie.
Roll them big enough to fit into your pie plate. Place one in your pie plate, and set aside the other to be the top.
To make the filling you will need:
1 lbs ground beef
1 lbs ground pork
1/2 chopped onion
3/4 cup beef broth
1 teaspoon salt
1/2 teaspoon pepper
1/2 teaspoon allspice
1/2 teaspoon ground cloves
1/2 teaspoon of cinnamon
3 cups of mashed potatoesHeat your oven to 400 degrees. Brown both the ground beef and pork in a medium to large saucepan. The beef and pork can be substituted with ground turkey or any other meat substitute you may want to try. Once browned drain the meat. Add the onion and cook until transparent.
Add the broth and simmer until the liquid is nearly gone. Mix in your seasonings and potatoes.
Add the meat and potato mixture into the prepared pie plate. Cover with the remaining pie crust. Flute the edges as normals, and slit to vent.
Bake for about 30 minutes and serve!
other posts
Here are some more articles to check out:
playdate poll
playdate top articles
- High Viral Loads Make Kids ‘Silent Spreaders’ of COVID-19 | Aug 20, 2020
- Clotting Tied to COVID-19 May Harm the Placenta | May 27, 2020
- ‘Kangaroo Care’ Has Big Health Benefits For Preemies | May 25, 2020
- Babies Are Spared Severe COVID-19 Symptoms | Mar 16, 2020
- Sleepless Babies May Face Emotional Troubles as Kids | Mar 10, 2020
- Secrets to Soothing a Cranky Baby Safely | Sep 05, 2019
- How to Protect Your Baby Against Eczema | Aug 22, 2019
- How to Protect Your Baby From Unsafe Products | Jul 24, 2019
